TL;DR:
- Setting up a new WordPress website is straightforward with a one-click auto-installer that completes the process in minutes, making manual installation unnecessary for most users.
- Post-installation steps like configuring permalinks, SSL, and backups are crucial for security, speed, and long-term site health, yet are often skipped.
Setting up a new website feels exciting right up until you stare at a blank hosting dashboard and wonder where to start. This wordpress installation guide walks you through everything from picking the right hosting plan to the critical steps after your site goes live. Whether you want a three-minute setup using a one-click auto-installer or need to understand the full manual process, you will find both paths here. You will also learn the post-installation configuration most beginners skip, which is exactly where sites get into trouble down the road.
Table of Contents
- Key takeaways
- What you need before starting
- Installing WordPress with one-click auto-installers
- Manual WordPress installation step by step
- Post-installation setup you should not skip
- Troubleshooting common installation problems
- My honest take after years of WordPress setups
- Start your WordPress site the right way with Insave
- FAQ
Key takeaways
| Point | Details |
|---|---|
| Use one-click installers first | Auto-installers cover database setup, file configuration, and install in under three minutes for most users. |
| Manual install builds real knowledge | Understanding the manual process helps you troubleshoot permission and database errors faster. |
| Post-installation setup matters most | Configuring permalinks, SSL, and backups right after install protects your site from day one. |
| Hosting choice affects speed directly | Server response time impacts performance more than your theme or plugins ever will. |
| Backups before every update | Always verify a full backup of files and database before updating WordPress core. |
What you need before starting
Before you touch any installer, you need three things locked in: a domain name, a hosting account, and login credentials for your hosting control panel. Most good hosting providers bundle domain registration with their plans, which saves you the extra step of pointing nameservers.
On the technical side, WordPress has specific requirements your hosting account must meet:
- PHP 8.1 or newer. WordPress requires PHP 8.1 at minimum, and modern servers running Ubuntu often default to PHP 8.3 or higher with the necessary extensions already active.
- MySQL 5.7+ or MariaDB 10.4+. Most shared hosting plans include this automatically. Modern setups should use the utf8mb4 character set for full Unicode support.
- HTTPS support. A free or paid SSL certificate keeps your admin login and visitor data encrypted from day one.
- An FTP client (like FileZilla) if you plan to do a manual install. You will not need this for the one-click method.
- A text editor for editing configuration files during manual installation.
Here is a quick WordPress installation checklist to run before you begin:
| Requirement | Status to verify |
|---|---|
| Domain name registered | Pointing to your hosting nameservers |
| Hosting account active | Control panel login working |
| PHP 8.1+ confirmed | Check in hosting control panel |
| MySQL/MariaDB database available | Ready to create a new database |
| SSL certificate available | Free or purchased through host |
| Admin email address | Separate from your personal email preferred |
Pro Tip: Never use "admin" as your WordPress username. It is the first username attackers try. Pick something unique and pair it with a strong password mix of uppercase letters, lowercase letters, numbers, and symbols.
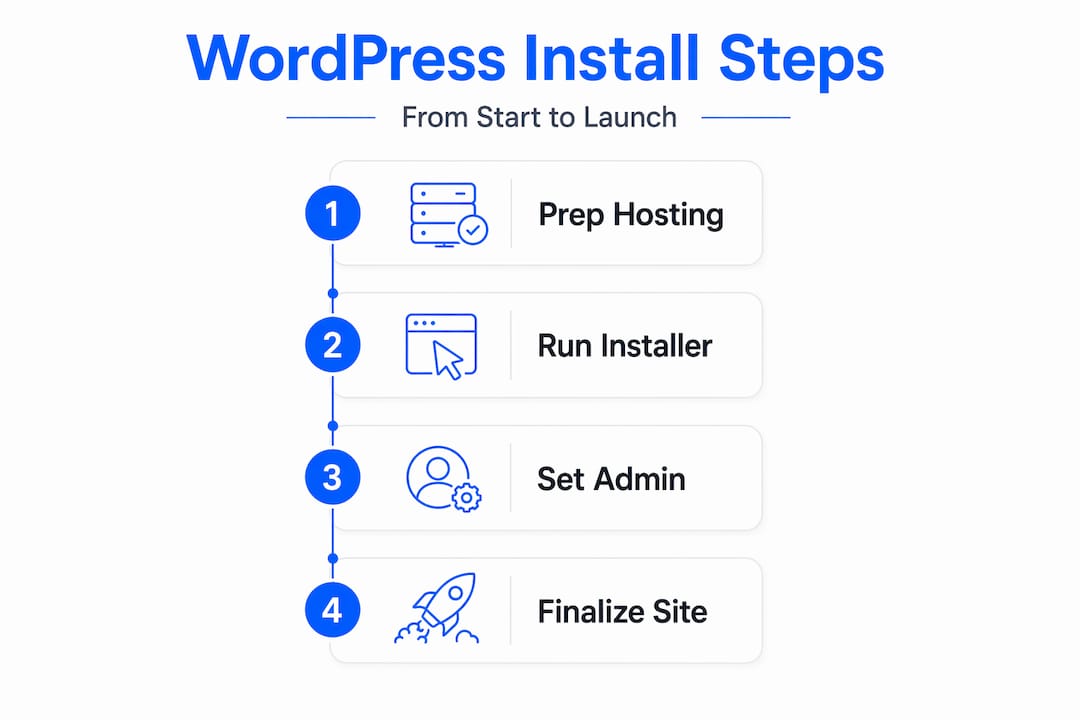
Installing WordPress with one-click auto-installers
This is the method recommended for 99% of beginners, and for good reason. The automated process handles database creation, file setup, and configuration in 30 seconds to three minutes. You do not need to touch a single config file.
Here is how it works across most hosting providers:
- Log into your hosting control panel. Most hosts use cPanel, though some like Hostinger use a custom dashboard. The steps are nearly identical across all of them.
- Find the WordPress installer. Look for Softaculous, WordPress Manager, or an Auto Installer icon. If you cannot find it, use the search bar inside your control panel. Most hosting providers including shared and managed hosts have this prominently placed.
- Click "Install Now" or "Install WordPress." This opens the setup form.
- Choose your domain. If you have multiple domains on your account, select the correct one from the dropdown.
- Fill in your site details. Enter a site title (you can change this later), your admin username, a strong password, and your admin email address.
- Set the installation directory. Leave this blank to install WordPress at your root domain (yoursite.com). If you type "blog," it installs at yoursite.com/blog instead.
- Click Install. The system creates a database, uploads WordPress files, runs the configuration, and hands you a fully functional site. You will see a confirmation screen with your site URL and your WordPress dashboard URL.
- Log in at yoursite.com/wp-admin. Use the credentials you just set.
The installer takes care of everything behind the scenes: creating the database, writing your wp-config.php file, and populating the database tables. You are looking at a working WordPress site in under five minutes. That is genuinely hard to beat.
Pro Tip: Write down your database name, database username, and database password from the installer confirmation screen. You will not see them again easily, and you may need them if you ever migrate your site manually.
Manual WordPress installation step by step
Manual installation is not harder. It is just more hands-on. Going through it once gives you a clear picture of how WordPress actually works, which makes troubleshooting far easier later. This section covers installing WordPress on hosting via a server like Ubuntu running Apache.
Here is the full process:
- Download WordPress. Go to wordpress.org and download the latest zip file. At the time of writing, starting on WordPress 7.0 directly is recommended if you are setting up a new site today rather than version 6.9.
- Upload files to your server. Extract the zip and upload the contents of the "wordpress" folder to your web root directory (usually public_html or /var/www/html) using an FTP client or your hosting file manager.
- Create a MySQL/MariaDB database. In cPanel, open MySQL Databases, create a new database, create a database user with a strong password, and assign that user to the database with "All Privileges." Without proper database permissions, your installation will fail.
- Rename and edit wp-config.php. Find wp-config-sample.php in your uploaded files, rename it to wp-config.php, and open it in a text editor. Enter your database name, database username, and database password in the labeled fields. Then visit the WordPress secret key generator at api.wordpress.org/secret-key/1.1/salt/ and paste the generated keys into the file.
- Configure Apache or Nginx. If you are on Apache, make sure your virtual host file includes "AllowOverride All` for your WordPress directory. Missing this one line is the most common cause of permalink 404 errors after installation. Then enable mod_rewrite and restart Apache.
- Set correct file permissions. Directories should be set to 755 and files to 644. Wrong permissions cause update failures and security gaps.
- Run the browser installer. Visit your domain in a browser. WordPress will detect your configuration and launch the famous five-minute install screen. Fill in your site title, admin username, password, and email, then click Install.
| Installation method | Best for | Time required | Technical skill needed |
|---|---|---|---|
| One-click auto-installer | Beginners and most SMBs | 1 to 5 minutes | Minimal |
| Manual installation | Advanced users, VPS setups | 20 to 60 minutes | Moderate to high |
Pro Tip: If your permalinks return 404 errors after manual install, go to Settings → Permalinks in your dashboard and click Save Changes without changing anything. This regenerates the .htaccess file and often fixes the problem immediately.
Post-installation setup you should not skip

Getting WordPress installed is step one. What you do in the first 30 minutes after installation determines how secure, fast, and SEO-friendly your site will be from the start.
Work through this list in order:
- Delete default content. Remove the sample post ("Hello World!"), the sample page ("Sample Page"), and the default comment. These add no value and look unprofessional.
- Set your permalink structure. Go to Settings → Permalinks and choose "Post name." This gives you clean URLs like yoursite.com/about instead of yoursite.com/?p=1, which matters for SEO.
- Update your site title and tagline. Go to Settings → General. Your tagline shows up in browser tabs and search results. Make it describe what your site actually does.
- Activate SSL and force HTTPS. If your host provides a free SSL certificate (most do now), activate it in your hosting control panel, then set your WordPress address and site address to use https:// in Settings → General. You can use a plugin to force redirects from HTTP to HTTPS automatically.
- Install a security plugin. Options like Wordfence or Solid Security add a firewall, login protection, and file scanning. This step alone prevents a significant portion of common attacks. Check out proven steps to secure WordPress for a deeper look.
- Set up automated backups. Daily automated backups that archive both your wp-content folder and your database give you a reliable restore point. Industry best practice is to verify backups before every update rather than assuming they worked.
- Install a caching plugin. A caching plugin dramatically reduces the load on your server and improves page load times for visitors.
- Choose and activate a theme. Pick a lightweight theme from the official WordPress repository or a trusted marketplace. Avoid loading a theme packed with features you will never use.
Pro Tip: Before you run your first WordPress core update, take a complete backup and test the update on a staging environment first. Major releases benefit from waiting one to two weeks so plugin compatibility issues get resolved by the broader community.
Troubleshooting common installation problems
Most WordPress installation errors have simple causes. Here is what to look for:
- "Error establishing a database connection." This means your wp-config.php has incorrect database credentials. Double-check the database name, username, and password. Also confirm the database user has been assigned to the database with full privileges.
- 404 errors on all pages except the home page. This is almost always a missing AllowOverride All directive in Apache, or mod_rewrite not being enabled. Go regenerate your .htaccess file via Settings → Permalinks as a first step.
- Can't access wp-admin after install. Clear your browser cache and cookies. If you are still locked out, your host's control panel may let you reset the admin password directly in the database.
- SSL certificate not working after activation. Check that both the WordPress Address and Site Address in Settings → General start with https://. Mixed content errors (some assets still loading over HTTP) are fixed with a plugin that scans and updates URLs.
- Installation times out or stalls. This sometimes happens with slow shared hosting or large file uploads. Try refreshing and checking whether the installation completed. Many hosts have a maximum PHP execution time of 30 to 60 seconds.
- File permission errors blocking updates. Set directories to 755 and files to 644. On Linux servers, the web server user (often www-data) needs to own the WordPress files to perform automatic updates.
If you have worked through this list and the problem persists, contact your hosting provider's support. A good host will confirm whether your server configuration meets WordPress requirements and help identify server-side causes fast.
My honest take after years of WordPress setups
I have installed WordPress more times than I can count, for clients ranging from solo bloggers to small businesses running active e-commerce stores. Here is what I keep coming back to.
The one-click installer is the right call for almost everyone. I used to think manual installation was a sign of doing things properly. It is not. It is just slower. The auto-installer produces an identical result in a fraction of the time. That said, I do think every WordPress site owner should read through the manual steps once, even if they never actually use them. Understanding what wp-config.php does, what a database user is, and why file permissions matter will save you hours when something breaks.
The biggest mistake I see beginners make is skipping the post-installation checklist entirely. They install WordPress, pick a theme, and start publishing. Then six months later their site gets hacked because they never set up a security plugin or set a strong admin password. The setup steps are genuinely where the long-term health of your site gets decided.
On hosting: I have seen beautifully optimized sites run slowly because the host was simply underperforming. Site speed issues are tied to hosting tier and server response time more than to themes or plugins. A TTFB over 800ms tells you the problem is at the server level, and no amount of plugin optimization will fully fix that. Pick a host with solid infrastructure before you spend time tweaking anything else. Once your site is live and working, stop fiddling with settings and start creating content. That is what actually grows your site.
— Ihor
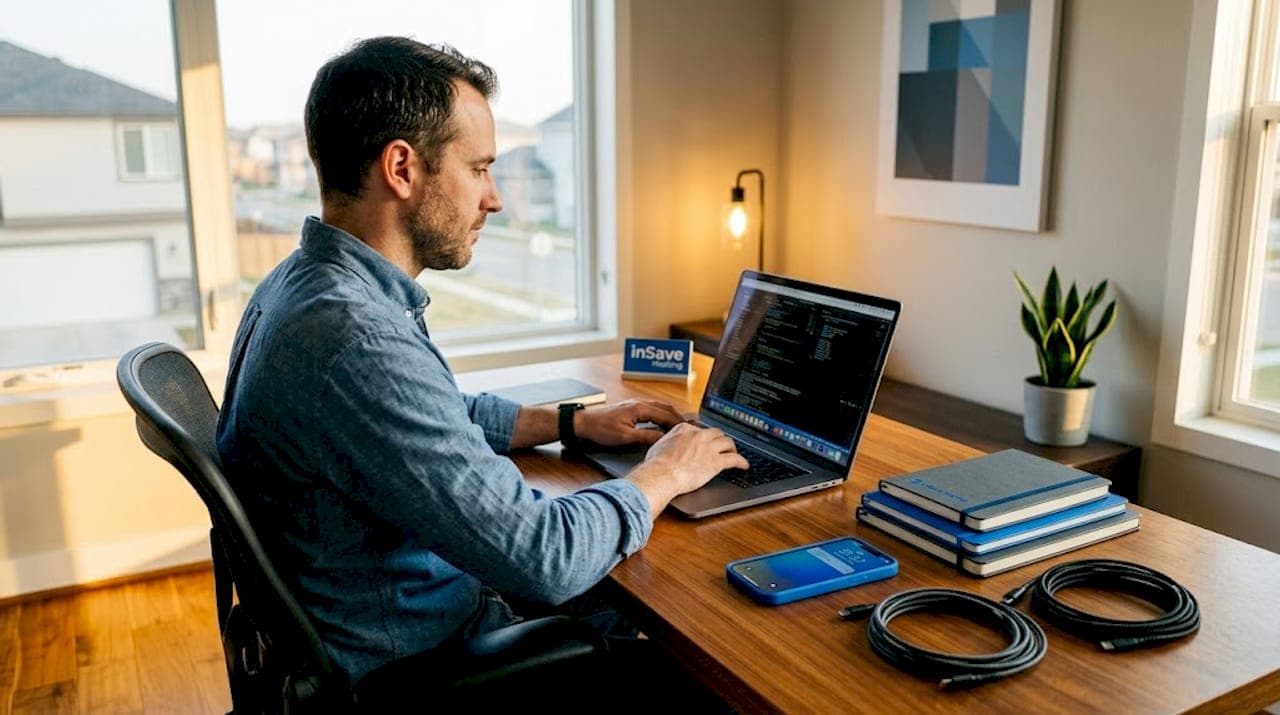
Start your WordPress site the right way with Insave
Ready to put this guide into action? Insave makes the entire process straightforward for individuals and small businesses who want a site that works from day one.
With Insave's WordPress hosting plans, you get one-click WordPress installation built directly into the control panel, so everything covered in this guide takes just minutes to complete. Plans include free SSL certificates, automated daily backups, and a free domain for the first year. The platform runs on LiteSpeed servers with LSCache, MariaDB, and free CDN integration, which means your site loads fast without any extra configuration. You can also register your domain and manage everything from one place. Explore the full range of hosting and site tools and get your WordPress site live today.
FAQ
How long does WordPress installation take?
Using a one-click auto-installer, the process takes 30 seconds to three minutes. Manual installation on a VPS or dedicated server typically takes 20 to 60 minutes depending on your familiarity with server configuration.
What PHP version does WordPress require?
WordPress requires PHP 8.1 or newer. Most modern hosting environments already run PHP 8.3 or higher, so you are unlikely to run into compatibility problems on a fresh hosting account.
Can I install WordPress without a hosting account?
No. WordPress needs a web server, a database, and a domain to run. You can set up a local environment on your computer for testing using tools like LocalWP or XAMPP, but a live site requires a hosting account.
What should I do right after installing WordPress?
Set your permalink structure to "Post name," delete default content, activate your SSL certificate, install a security plugin, and set up automated backups. These steps take under 30 minutes and protect your site from the most common early problems.
Why do my permalinks show 404 errors after a manual install?
This almost always means Apache's AllowOverride All directive is missing from your virtual host configuration, or mod_rewrite is not enabled. Go to Settings → Permalinks in your dashboard and click Save Changes to regenerate your .htaccess file as a quick fix.