
TL;DR:
- Website deployment involves moving complete code, content, and settings from development to a live server for user access.
- It includes building, testing, transferring, configuring, and verifying the site before and after going live to ensure a successful launch.
Most people assume website deployment means dragging files into a folder and calling it done. It's more than that. Website deployment is the full process of moving your finished code, content, and configuration from a development environment to a live server where real users can access it. Done right, it includes building, testing, transferring, configuring, and verifying your site before and after it goes public. This guide walks you through every stage of the website deployment process, from the tools and prerequisites you need to the steps that separate a clean launch from a broken one.
Key Takeaways
| Point | Details |
|---|---|
| Deployment is a multi-step process | Moving a site live involves building, testing, transferring files, configuring settings, and verifying output. |
| Prerequisites matter before you deploy | You need a registered domain and a hosting provider before any files can go live. |
| Staging prevents costly mistakes | Always test in a staging environment before pushing to production to catch errors in a real server setup. |
| Automation reduces human error | CI/CD pipelines and deployment tools like DeployHQ can trigger updates from code pushes automatically. |
| Post-deployment monitoring is non-negotiable | Verification and uptime monitoring after launch confirm your site is actually working as expected. |
What website deployment really means
According to the standard industry definition, software deployment is the process of moving code and assets from a development environment into a live environment, including installation, configuration, and getting the system running. For websites, that means taking what you built locally and making it accessible on a real server connected to the internet.
There are three environments most deployments touch:
- Development: Your local machine or a private server where you build and edit the site.
- Staging: A copy of the live server used to test the site under real conditions before launch.
- Production: The live server your visitors actually reach.
One clarification that trips up a lot of newcomers: deployment and release are not the same thing. Deployment activates code while release makes features visible to users. A team can deploy new code to production without immediately surfacing it to visitors. This separation lets you move fast without exposing users to unfinished work.
Pro Tip: Think of deployment as the technical act of getting code onto a server. Release is the business decision about who sees it and when. Keeping these separate gives you more control over your launch.
What you need before deploying
Before you can deploy anything, two foundational elements must be in place. First, a domain name. Second, a hosting provider. A domain is your website address and a hosting provider supplies the server space where your files actually live. Without both, there is nowhere for your site to land.
Here is what to sort out before you begin:
- Domain name: Register a name that matches your brand. Extensions like .com, .org, and .net are still the most trusted. Insave offers domain registration with a free first year on many plans.
- Hosting provider: Your hosting choice directly affects your site's speed, reliability, and how easy deployment will be. Hosting options vary widely. Shared hosting suits small sites and new businesses well. Managed WordPress hosting removes most of the technical setup if you are running WordPress.
- Version control: A system like Git tracks every change to your codebase. It lets you roll back to a working state if a deployment breaks something, and it is the backbone of most modern deployment workflows.
- SSL certificate: An SSL certificate encrypts data between your server and your visitors. Many hosting providers, including Insave, include it free, but confirm it is active before you go live.
Hosting and domain compatibility matters more than most beginners realize. Choosing a host that matches your site's technology stack saves hours of configuration headaches at deployment time.
The deployment process, step by step
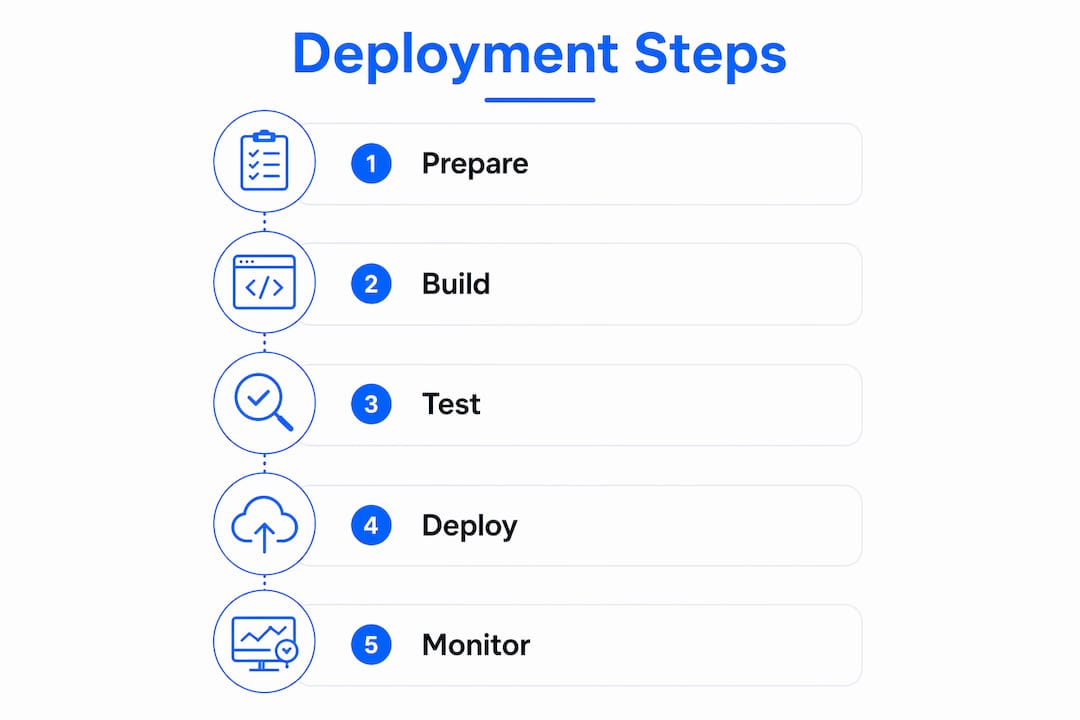
The typical deployment flow runs through five stages: build, test, stage, deploy to production, then verify and monitor. Here is how that translates into real actions:
- Build and test locally. Run your site on your own machine. Confirm all pages load, forms work, links resolve, and no console errors appear. Fix issues here before they reach any server.
- Push to a staging environment. Upload or sync your code to a staging server. This is a near-identical copy of production. Staging catches environment-specific issues that automated tests on your local machine simply cannot replicate, such as file permission errors or database connection differences.
- Transfer files to the live server. Use FTP, SFTP, Git-based deployment, or a deployment pipeline. SFTP is more secure than plain FTP and should be your minimum standard. For larger projects, a Git push connected to a deployment tool is faster and less error-prone.
- Configure the server and DNS settings. Point your domain to your hosting server by updating your DNS records. This is where many first-time deployers wait in confusion. DNS propagation can take anywhere from a few minutes to 48 hours.
- Verify functionality on the live site. Check every page. Test your contact forms, payment flows, navigation links, and mobile layout. Confirm your SSL certificate is active and your site loads over HTTPS.
Deployment can be manual or automated using CI/CD pipelines. Manual deployment requires a person to execute each step. Automated deployment, also called continuous deployment, pushes validated changes to the server automatically when code passes tests. For small sites, manual works fine. For sites that update frequently, automation saves significant time and reduces errors.
Pro Tip: Never deploy directly from your local machine to production without a staging step. What works on your computer may fail in a different server environment. Staging is where you catch that before your visitors do.

Deployment strategies and tools
Once you understand the process, the next question is which strategy fits your situation. Different deployment strategies handle risk differently, and picking the right one depends on your site's complexity and tolerance for downtime.
| Strategy | How it works | Best for |
|---|---|---|
| Standard deployment | Replace existing files with new ones directly | Simple sites with low traffic |
| Blue-green deployment | Run two identical environments; switch traffic between them | Sites that cannot afford downtime |
| Rolling deployment | Gradually update servers one by one | Larger sites with multiple servers |
| Staged rollout | Release to a small percentage of users first | Testing changes with minimal risk |
A few tools that make this easier:
- DeployHQ: Automates deployments from Git pushes and integrates build processes, which reduces manual steps and the chance of pushing broken code.
- GitHub Actions: Runs automated workflows triggered by code changes. You can set it to test, build, and deploy on every pull request merge.
- Delta deployment: Rather than replacing all files each time, delta analysis calculates only what changed and updates those files. This makes deployments faster and reduces the window where something can go wrong.
The common thread across all good deployment practices is a rollback plan. Before you deploy, know exactly how to revert to the previous version if something breaks. Git makes this straightforward. So do most modern hosting platforms with snapshot or backup tools.
Monitoring after you go live
A lot of new webmasters treat deployment as the finish line. It is not. Deployment is only complete after monitoring confirms the site is running correctly in production without issues.
Here is what post-deployment verification looks like in practice:
- Functional testing: Walk through your site as a real user. Test the checkout flow, the login system, embedded media, and any third-party integrations.
- Performance checks: Use a tool like Google PageSpeed Insights to confirm page load times are acceptable. A site that worked fast locally can feel slow on certain server configurations.
- Uptime monitoring: Set up a monitor that checks your site at regular intervals and alerts you by email or SMS if it goes down. Insave's 360 monitoring tool handles this without requiring a separate service.
- Error log review: Check your server error logs in the first 24 to 48 hours. Small issues like missing files or misconfigured redirects often appear here before users report them.
- Security scan: Confirm your site's security posture after deployment. SSL should be active, admin paths should be protected, and any unnecessary file permissions should be locked down.
Monitoring supports uptime and quick rollback if a production issue appears. The goal is to catch problems in minutes, not days.
Pro Tip: Set up uptime monitoring before you go live, not after something breaks. Knowing your site went down at 2 AM is far better than finding out from a frustrated customer at noon.
My honest take on deployment for beginners
I've watched hundreds of new webmasters treat deployment as an afterthought, something to rush through once the design is finalized. That is where most launch problems come from.
In my experience, the two steps people skip most are staging and post-deployment monitoring. Skipping staging because you are in a hurry is a false economy. You will spend more time fixing a broken live site than you would have spent testing a staging environment for 30 minutes. And skipping monitoring means you are flying blind after launch. You have no idea when something stops working or how long it has been broken.
What I've found works best for newcomers is treating deployment as its own project, not a footnote to web design. Write out your steps before you start. Know your rollback process. Have a short website launch checklist ready to verify key pages and features after you go live.
The good news is that once you have done it once with discipline, the second deployment takes a fraction of the time. Automation tools, version control, and a solid hosting environment handle most of the heavy lifting. Your job is to set that foundation correctly the first time.
— Ihor
Launch your site with confidence using Insave
Getting website deployment right starts with having the right foundation. Insave makes that part straightforward. With hosting and domain packages built for small businesses and new webmasters, you get a free domain for the first year, a free SSL certificate, one-click WordPress installation, and 99.9% uptime backed by LiteSpeed technology. Insave also includes staging tools and free site migration, so you can test before you go live and move an existing site without starting from scratch. If you are working through your first deployment, the shared hosting plans give you everything you need without paying for infrastructure you do not yet use. Start with a plan that grows with you.
FAQ
What is website deployment in simple terms?
Website deployment is the process of moving your finished website from a local or development environment to a live server where anyone on the internet can visit it. It includes transferring files, configuring settings, and verifying the site works correctly.
What is the difference between web hosting and website deployment?
Web hosting is the service that provides the server space where your site lives. Website deployment is the act of moving your site files onto that server and making them accessible to visitors. You need both, but they are separate steps.
Do I need a staging environment to deploy a website?
A staging environment is not mandatory, but it prevents the majority of deployment failures. It lets you test your site in a real server setup before exposing it to visitors, catching configuration issues that local testing misses.
What is a CI/CD pipeline in website deployment?
CI/CD stands for continuous integration and continuous deployment. It is an automated workflow that tests and deploys your code to the live server whenever you push a code change, reducing manual steps and human error.
How long does DNS propagation take after deployment?
DNS propagation typically takes between a few minutes and 48 hours after you update your domain's DNS records. During that window, some visitors may see the old site while others see the new one, depending on their location and internet provider.