
TL;DR:
- Proper email setup requires correct credentials, server details, and encryption protocols to ensure reliable sending and receiving. Small businesses should prefer manual configuration over automatic wizards, especially for custom domains, to prevent silent errors and maintain control. Using IMAP with encrypted ports and a professional domain-based email enhances security and future-proofing.
Email setup is the process of configuring your email account on a client or device so you can send, receive, and organize messages. A proper step by step email setup requires three things: your login credentials, the correct server settings, and the right protocol. Most people skip the preparation phase and hit avoidable errors. This guide covers everything from gathering your credentials to configuring desktop and mobile clients, plus troubleshooting the issues that trip up small business owners most often.
What you need before starting your email setup
Preparation is the single biggest factor in a smooth configuration. Setup takes 10–15 minutes when you have everything ready. Without the right details on hand, that estimate doubles.
The information you must gather first
Collect these details before you open any settings screen:
- Full email address (e.g., you@yourdomain.com)
- Password or app password (required if two-factor authentication is active)
- Incoming mail server (IMAP address, e.g., mail.yourdomain.com)
- Outgoing mail server (SMTP address, e.g., mail.yourdomain.com)
- Port numbers (IMAP 993, SMTP 587)
- Encryption type (SSL/TLS for IMAP, STARTTLS for SMTP)
| Detail | Where to find it |
|---|---|
| Email address | Your email provider or hosting account |
| IMAP server address | Hosting control panel or provider documentation |
| SMTP server address | Hosting control panel or provider documentation |
| Port numbers | Provider's email setup guide |
| App password | Your account's security settings (if 2FA is on) |
IMAP vs. POP3: which one to use
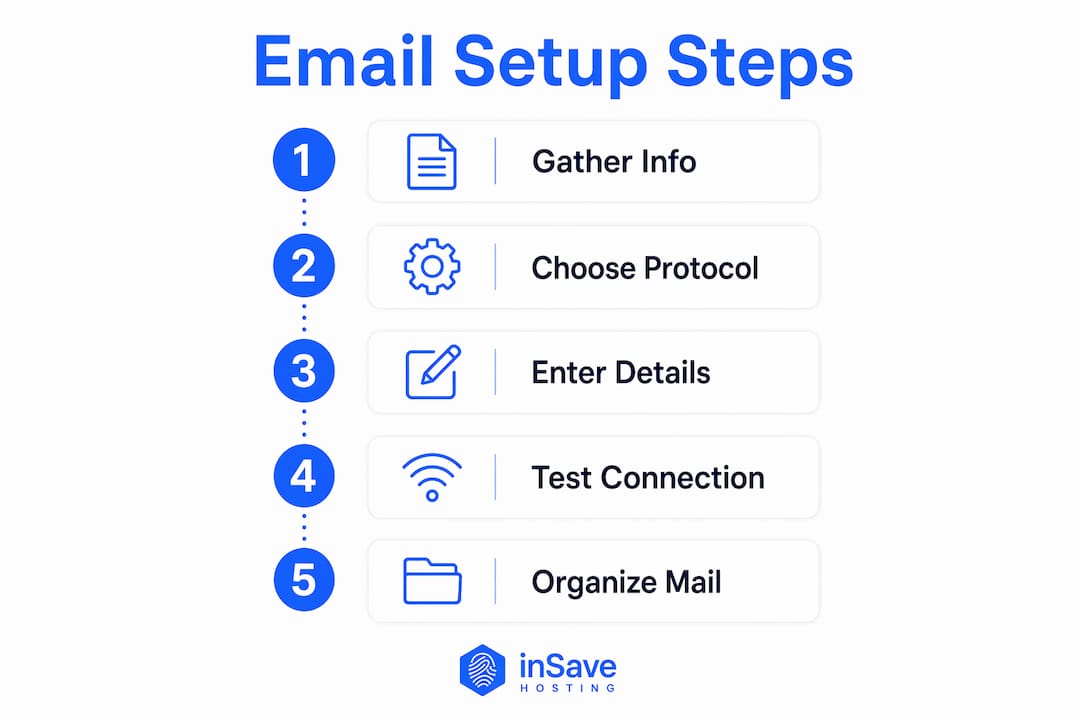
IMAP is the industry standard for professional and small business email. It keeps your inbox synchronized across every device you use. POP3 downloads messages to one device and removes them from the server. For anyone checking email on a phone, laptop, and tablet, POP3 creates gaps and lost messages. Choose IMAP every time.
A word on ISP email addresses
Avoid email addresses tied to your ISP. If you switch internet providers, you lose access to that address permanently. For business owners, a domain-based address like you@yourbusiness.com protects your contacts and your reputation. Learn more about how professional email hosting affects your brand credibility.
Pro Tip: Write down all your server details in a secure note before you start. You will need them again if you add a second device or reinstall your email client.
How to set up email on a desktop client, step by step

Desktop email clients offer the most control over your configuration. Auto-detect frequently fails for custom domains, so knowing the manual path is not optional. It is the reliable path.
Step-by-step desktop configuration
- Open your email client and locate the option to add a new account.
- Enter your full email address and password. Let the client attempt automatic configuration first.
- If auto-setup fails, select manual setup or advanced options.
- Choose IMAP as the account type.
- Enter your incoming mail server address and set the port to 993 with SSL/TLS encryption.
- Enter your outgoing mail server address and set the port to 587 with STARTTLS encryption.
- Enable outgoing server authentication. Use the same credentials as your incoming server.
- Save the settings and let the client test the connection.
- Send a test message to yourself. Confirm it arrives in your inbox.
Testing send and receive after configuration is the only way to confirm the setup actually works. A successful connection screen does not guarantee messages will flow correctly.
Automatic vs. manual setup: what to expect
| Method | Best for | Risk |
|---|---|---|
| Automatic | Major providers with standard domains | Fails on custom or hosted domains |
| Manual | Custom domains, business email, hosted accounts | Requires correct server details upfront |
Pro Tip: Type your email address exactly as provided, with no extra spaces or capital letters. A single typo in the address field causes authentication failures that look like password errors.
How to set up email on mobile devices (iOS and Android)
Mobile email setup follows the same logic as desktop, but the menus differ by operating system. Both iOS Mail and Android's built-in mail app support IMAP and will attempt automatic configuration first.
iOS setup steps
- Go to Settings, then Mail, then Accounts.
- Tap Add Account and select Other if your provider is not listed.
- Enter your name, full email address, password, and a description.
- Select IMAP on the next screen.
- Enter your incoming server address (port 993, SSL on) and outgoing server address (port 587, SSL on).
- Tap Next and wait for verification.
- Choose which data to sync (Mail, Contacts, Calendars) and tap Save.
Android setup steps
- Open the Email or Gmail app and choose Add Account.
- Select Other or Personal (IMAP) from the account type list.
- Enter your full email address and tap Manual Setup.
- Choose IMAP and enter your incoming server details (port 993, SSL/TLS).
- Enter your outgoing SMTP server details (port 587, STARTTLS).
- Set sync frequency and notification preferences, then tap Done.
App-specific passwords are required when two-factor authentication is active on your account. Using your main password in this situation will always fail. Generate the app password from your account's security settings before starting mobile setup.
Common mobile setup mistakes to avoid
- Using port 25 for SMTP (blocked by most carriers and ISPs)
- Leaving SSL/TLS turned off to "fix" a connection error
- Entering the SMTP server address in the IMAP field
- Skipping outgoing server authentication
- Forgetting to update the app password after regenerating it
Pro Tip: Set your sync frequency to every 15 or 30 minutes rather than "push" for battery savings. Enable notifications only for your primary inbox to reduce interruptions.
Common troubleshooting tips for email configuration
Most email setup failures fall into three categories: wrong credentials, wrong server details, or wrong port settings. Fixing one of those three resolves the majority of issues.
Password and authentication errors
Many users fail at this step because they enter their main account password when two-factor authentication is active. The client receives an authentication error that looks like a wrong password. The fix is to generate an app-specific password from your account's security settings and use that instead.
Server address and port issues
Double-check every character in your IMAP and SMTP server addresses. A single wrong letter causes a connection timeout. Use port 993 for IMAP and port 587 for SMTP with the correct encryption. Port 25 is reserved for server-to-server relay and is blocked by most ISPs to prevent spam. Never use it for client-side sending.
Best practices after a successful setup
- Enable SSL/TLS on both incoming and outgoing connections
- Turn on outgoing server authentication
- Test send and receive with a message to a second address you control
- Save your server settings in a secure location for future reference
- Use incoming email filtering to keep your inbox clean from day one
A well-configured email account is only as reliable as the hosting behind it. If your server goes down or your domain expires, no client settings will save your inbox.
Pro Tip: After setup, create at least three folders: one for clients, one for receipts, and one for internal team messages. Starting organized saves hours of sorting later.
Key takeaways
A complete email setup requires correct credentials, IMAP protocol, encrypted ports 993 and 587, and a send/receive test to confirm everything works.
| Point | Details |
|---|---|
| Gather credentials first | Collect your email address, password, IMAP server, and SMTP server before opening any settings. |
| Choose IMAP over POP3 | IMAP syncs your inbox across all devices; POP3 limits access to one machine. |
| Use encrypted ports | Set IMAP to port 993 with SSL/TLS and SMTP to port 587 with STARTTLS for security. |
| Prepare for manual setup | Auto-detect fails on custom domains; always have your server details ready. |
| Test after every setup | Send and receive a test message to confirm your configuration is fully working. |
Why I think automatic setup gives small businesses a false sense of security
Automatic configuration wizards are convenient. They are also the reason I see the same setup failures repeat across small business accounts every year. The wizard works fine for major consumer providers. The moment you use a custom domain hosted on a shared server, auto-detect either pulls the wrong settings or fails silently. The client shows a green checkmark, but outgoing mail queues without sending.
The deeper issue is that business owners trust the wizard and never learn what IMAP port 993 or SMTP port 587 actually means. That gap costs them when something breaks. A server migration, a password reset, or a new phone becomes a crisis instead of a five-minute fix.
My honest advice: run the manual setup at least once, even if the automatic option works. Write down every field you fill in. That record becomes your troubleshooting cheat sheet for the next three years. Pair that with a domain-based email address, not an ISP address, and you have a professional setup that survives provider changes and device upgrades without losing a single message.
The small business owners who handle email confidently are not the ones with the fanciest clients. They are the ones who did the setup manually once and understood what they were doing.
— Ihor
Professional email hosting that makes setup straightforward
Getting your email configured correctly starts with having the right hosting behind it. inSave Hosting provides shared hosting plans built for small businesses, with email support included and server settings clearly documented in your control panel.
inSave Hosting includes free SSL certificates on every plan, which means your IMAP and SMTP connections stay encrypted from day one. You also get a free domain for the first year, so you can set up a professional domain-based address instead of relying on an ISP email. If you want a complete setup with hosting, domain, and email all in one place, explore the full hosting packages and get your professional email running today.
FAQ
What is the difference between IMAP and POP3?
IMAP syncs your email across all devices and keeps messages on the server. POP3 downloads messages to one device and typically removes them from the server.
What ports should I use for IMAP and SMTP?
Use port 993 with SSL/TLS for IMAP and port 587 with STARTTLS for SMTP. Avoid port 25 for client-side sending.
Why does my email client keep asking for my password?
The most common cause is using your main account password when two-factor authentication is active. Generate an app-specific password from your account's security settings and use that instead.
How long does email setup take on a desktop client?
Desktop email configuration takes 10–15 minutes when you have your credentials and server settings ready before you start.
Should I use my ISP email address for business?
No. ISP email addresses are tied to your internet provider. If you switch providers, you lose access to that address. Use a domain-based address for any professional or business communication.