
TL;DR:
- A structured blog setup workflow guides you from domain registration to a live, indexed website efficiently. Focusing on essential planning, a clean WordPress install, minimal plugins, and a pre-launch checklist ensures sustained content creation and growth. The key to success lies in consistent publishing and iterative improvement rather than perfect setup details.
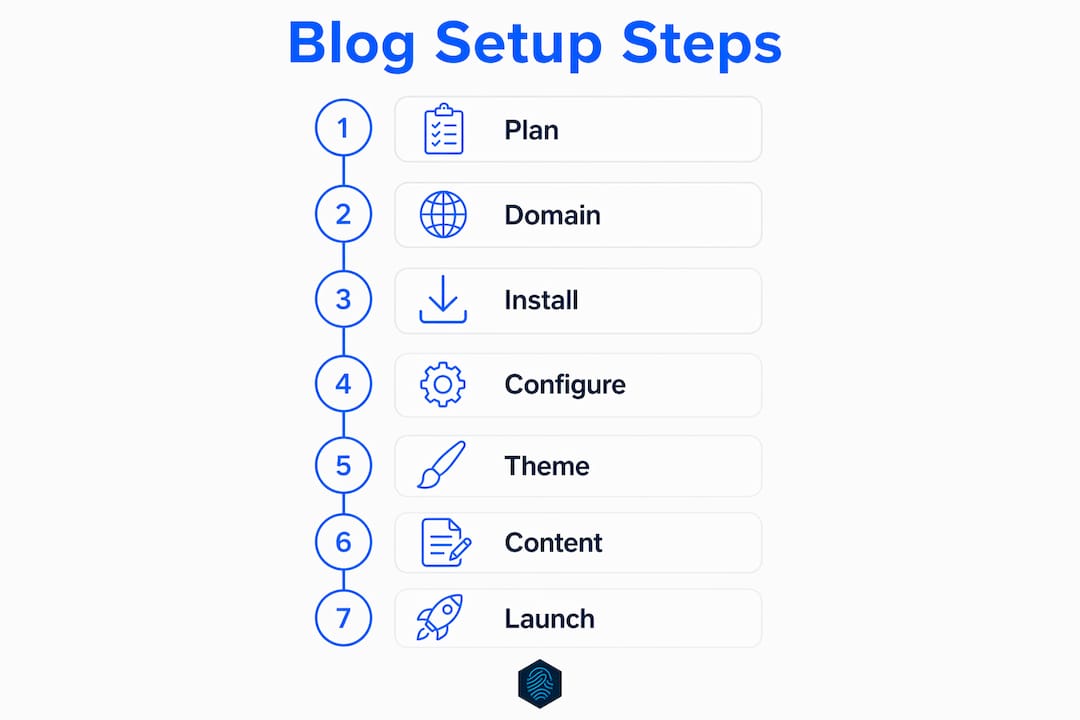
A blog setup workflow is a structured, repeatable process that takes you from blank domain to published blog without losing weeks to indecision or configuration rabbit holes. WordPress powers over 40% of all websites, making it the default platform for new bloggers in 2026. Tools like Rank Math, Wordfence, and Google Search Console each play a defined role in this process. Follow this guide and you will have a live, indexed, and content-ready blog by the end of it.
What are the essential steps in a blog setup workflow?
Planning is the phase most new bloggers skip, and it is the reason most blogs stall before the third post. A structured blog setup treats your blog as a minimum viable product: launch with the essentials, then add complexity based on real feedback. That single mindset shift removes the pressure to get everything perfect before publishing.
Start by defining three things: your niche, your reader, and your goal. A niche is not just a topic. It is a topic plus an audience plus a point of view. "Personal finance for freelancers under 30" is a niche. "Money tips" is not. Your reader definition should answer what they already know, what they are trying to solve, and what action you want them to take after reading each post.
Next, list five to eight core content categories. These become your blog's navigation and your editorial calendar's backbone. Examples include "Budgeting Basics," "Tax Strategy," and "Freelance Income Streams" for a personal finance blog. Keeping categories tight prevents the sprawl that makes blogs feel unfocused.
Pro Tip: Use a free tool like Google Trends or AnswerThePublic to validate your categories before you build. If nobody is searching for a topic, no amount of great writing will bring traffic.
- Define your niche with audience and angle, not just topic
- List five to eight content categories that reflect real reader intent
- Set a publishing cadence you can hold for six months, not just six weeks
- Identify three to five competitor blogs to study structure and gaps
How to install WordPress and configure core settings
The technical setup phase of your blog creation workflow has a clear sequence. Skipping steps or doing them out of order creates problems that are painful to fix on a live site.
Step 1: Register your domain and choose hosting. Pick a domain name that is short, memorable, and free of hyphens. For hosting, managed WordPress hosting removes server management from your plate entirely. inSave Hosting offers one-click WordPress installation, free SSL certificates, and a free domain for the first year, which covers the three most common friction points for new bloggers.

Step 2: Install WordPress via your host's control panel. Most hosts provide a one-click installer through cPanel or a custom dashboard. The WordPress installation process takes under five minutes when your hosting is already active.
Step 3: Set your permalink structure immediately. Navigate to Settings > Permalinks and select Post name (/%postname%/). A clean permalink structure is SEO-friendly and built for evergreen content. Change this after publishing and you will need 301 redirects on every existing URL.
Step 4: Enforce HTTPS. Go to Settings > General and confirm both WordPress Address and Site Address begin with https://. Then verify your SSL certificate is active. If your host provides a free SSL, it should activate automatically within minutes of domain propagation.
Step 5: Configure essential general settings. Set your timezone to match your primary audience, adjust discussion settings to require comment approval, and set your Reading settings so your homepage displays your latest posts or a static front page, depending on your blog structure.
Pro Tip: Set your blog to "discourage search engines" during setup, but add a calendar reminder to uncheck it on launch day. Forgetting this single setting is one of the most common reasons new blogs are invisible to Google for weeks.
Here is a quick reference for the core settings to configure on day one:
| Setting | Location | Recommended value |
|---|---|---|
| Permalink structure | Settings > Permalinks | Post name |
| WordPress Address | Settings > General | https://yourdomain.com |
| Timezone | Settings > General | Your primary audience's timezone |
| Comment moderation | Settings > Discussion | Require manual approval |
| Search engine visibility | Settings > Reading | Unchecked before launch |
How to choose a theme, install plugins, and organize your content
Theme selection is where new bloggers lose the most time. The right theme for a new blog is fast, mobile-responsive, and simple. GeneratePress, Kadence, and Astra are three themes built specifically for performance. All three load under two seconds on shared hosting and score well on Google PageSpeed Insights without custom optimization.
Avoid themes with built-in page builders, sliders, or demo content you do not need. Every feature a theme loads by default adds weight to your pages. A clean theme with minimal JavaScript is always the better starting point.
Plugin selection follows the same logic. Install only what you need to function on launch day, and add more based on actual problems you encounter. The following list covers the minimum viable plugin set for a new blog:
- SEO: Rank Math or Yoast SEO for on-page optimization, sitemaps, and schema markup
- Caching: LiteSpeed Cache or W3 Total Cache to reduce server load and improve page speed
- Security: Wordfence Security for firewall protection and malware scanning
- Backups: UpdraftPlus for automated, scheduled backups to cloud storage
- Forms: WPForms Lite for contact forms without coding
Create your core pages before you publish any posts. Every blog needs an About page, a Contact page, and a Privacy Policy page. The Privacy Policy is not optional if you collect any user data, including email addresses or analytics cookies. After pages are live, build your navigation menu under Appearance > Menus and link your core pages and top categories.
What are the critical pre-launch checks before going live?
A pre-launch checklist is not a formality. It is the difference between a blog that gets indexed within days and one that sits invisible for months. Run through these steps in order before you flip the switch.
Step 1: Verify SSL is active. Open your site in a browser and confirm the padlock icon appears in the address bar. If it does not, contact your host. A missing SSL certificate damages both visitor trust and search rankings. For a detailed walkthrough of SSL installation steps, the process is straightforward on most managed hosts.
Step 2: Uncheck "Discourage search engines." Go to Settings > Reading and confirm this box is unchecked. Leaving this enabled silently blocks Google from indexing your site. It is the most common launch-day mistake and the hardest to diagnose if you do not know to look for it.
Step 3: Submit your sitemap to Google Search Console. Install Rank Math or Yoast SEO first, as both generate a sitemap automatically at yourdomain.com/sitemap.xml. Then add your site to Google Search Console, verify ownership via DNS TXT record or HTML file, and submit your sitemap URL through the Sitemaps report. Also add a Sitemap directive to your robots.txt file as a backup for crawler discovery.
Step 4: Run a test backup and restore. Use UpdraftPlus to create a full backup, then verify the restore process works before you need it in an emergency.
Step 5: Publish your first post. Your first post should be at least 800 words, include your target keyword in the title and first paragraph, and have at least one internal link to another page on your site. Longer posts in the 1,200 to 1,800 word range tend to rank faster for competitive keywords.
A blog that launches imperfectly and improves is always more successful than one that never launches at all. The Minimum Viable Blog approach exists precisely because perfectionism is the leading cause of blog failure, not technical complexity.
How to maintain a sustainable content workflow after launch
The blog launch process ends on day one. The content workflow runs for years. A sustainable blog workflow splits into five repeating phases: Capture, Plan, Draft, Edit, and Publish and Review. Each phase has a defined output, which prevents the blank-page paralysis that kills publishing consistency.
Capture means collecting ideas continuously, not just when you sit down to write. Use a notes app like Notion or Apple Notes to log topic ideas, reader questions, and competitor gaps as you encounter them. Plan means turning raw ideas into a structured editorial calendar with assigned publish dates. Draft and Edit are self-explanatory, but keeping them as separate sessions on different days produces cleaner writing. Publish and Review means hitting publish and then checking performance data one week later.
Pro Tip: Schedule a 30-minute monthly review to check Google Search Console for your top five performing posts. Update those posts with new information or internal links before chasing new topics. Updating existing content delivers faster ranking improvements than publishing new posts at the same frequency.
Build your review schedule into your calendar from day one:
- Weekly: Write and publish one post, respond to comments, check for broken links
- Monthly: Review top posts in Google Search Console, update one older post, check plugin updates and security scan results
- Quarterly: Audit your content categories, review your hosting plan performance, assess whether your niche focus still matches reader behavior
Treat your blog as a small operating system with scheduled maintenance windows. Blogs with explicit review checkpoints avoid the slow drift where small problems compound into broken habits and eventual abandonment.
Key takeaways
A successful blog setup workflow requires planning, a clean WordPress installation, a minimal plugin set, and a pre-launch checklist executed in sequence before any post goes live.
| Point | Details |
|---|---|
| Plan before you build | Define niche, audience, and five to eight content categories before touching WordPress. |
| Set permalinks on day one | Choose Post name structure immediately and never change it on a live site. |
| Run the pre-launch checklist | Verify SSL, uncheck search engine discouragement, and submit your sitemap before publishing. |
| Use a minimal plugin set | Start with SEO, caching, security, and backup plugins only. Add more based on real needs. |
| Build a repeatable content cycle | Follow Capture, Plan, Draft, Edit, and Publish and Review phases with weekly and monthly checkpoints. |
What I have learned about blog setup that most guides skip
Most blog setup guides treat the technical steps as the hard part. They are not. The hard part is resisting the urge to keep configuring instead of publishing. I have seen bloggers spend three weeks testing themes, switching between Rank Math and Yoast SEO, and redesigning their homepage before writing a single post. The blog never launched.
The Minimum Viable Blog concept changed how I think about this. You do not need a perfect theme, ten plugins, and a custom logo to publish. You need a working WordPress install, one clean theme, and something worth reading. Everything else is iteration. The blogs I have watched grow fastest are the ones that published their first post within 72 hours of buying the domain.
The other trap is skipping the pre-launch checklist because it feels bureaucratic. That "Discourage search engines" checkbox has cost bloggers months of indexing time. The sitemap submission step takes four minutes in Google Search Console and accelerates discovery for new sites that have zero backlinks pointing to them. These are not optional steps. They are the difference between a blog that gets found and one that does not.
My honest advice: print the five-phase content workflow, pin it somewhere visible, and treat publishing as a non-negotiable weekly appointment. The bloggers who build audiences are not the ones with the best setups. They are the ones who showed up consistently after the setup was done.
— Ihor
Start your blog the right way with inSave Hosting
Setting up a blog is significantly easier when your hosting handles the technical foundation for you. inSave Hosting provides managed WordPress hosting with one-click installation, free SSL certificates, and a free domain for the first year, covering the three setup steps that slow most new bloggers down. The platform runs on LiteSpeed with free CDN integration, which means your blog loads fast from day one without additional configuration. If you are ready to move from planning to publishing, explore inSave Hosting's shared hosting plans built for bloggers who want performance without complexity.
FAQ
What is a blog setup workflow?
A blog setup workflow is a structured sequence of steps covering niche planning, WordPress installation, core configuration, plugin setup, and pre-launch checks that results in a live, indexed blog ready to publish content.
How long does it take to set up a WordPress blog?
A focused WordPress blog setup takes one to two days when following a defined checklist. Technical installation takes under an hour; the remaining time covers configuration, theme selection, and pre-launch verification.
What plugins do I need for a new blog?
New blogs need four plugin categories: an SEO plugin like Rank Math or Yoast SEO, a caching plugin, a security plugin like Wordfence, and a backup plugin like UpdraftPlus. Start with these and add more only when a specific need arises.
Why is my new blog not showing up on Google?
The most common cause is the "Discourage search engines from indexing this site" setting remaining checked in WordPress Settings > Reading. The second most common cause is not submitting a sitemap to Google Search Console after launch.
What is the Minimum Viable Blog approach?
The Minimum Viable Blog approach means launching with only the features needed to publish and read content, then adding functionality based on real reader feedback. It reduces decision fatigue and prevents the perfectionism that stops most blogs from ever going live.