
TL;DR:
- Proper CDN integration speeds up website load times by 40-60 percent for international visitors. It requires thorough preparation, including backing up the site, documenting DNS records, and securing an SSL certificate before configuring DNS and caching rules. Incremental setup—focusing on DNS, SSL, and cache control—ensures reliable performance and easier troubleshooting.
CDN integration is the process of configuring your website and DNS to route traffic through a global network of edge servers that cache and deliver your content faster and more reliably. Done correctly, a CDN reduces load times by 40–60% for international visitors. That kind of gain is not a minor tweak. It is the difference between a visitor who stays and one who bounces before your page finishes loading. This guide walks you through cdn integration step by step, covering prerequisites, execution, troubleshooting, and ongoing monitoring in a vendor-neutral way that works regardless of which CDN provider you choose.
What do you need before starting CDN integration?
Preparation prevents the most common setup failures. Skipping this phase is the single biggest reason CDN rollouts break live sites.
Start with these requirements before touching any DNS or CDN settings:
- Full site backup. Export your files and database. If anything breaks during the DNS cutover, you need a clean restore point.
- Document your current DNS records. Write down every A, CNAME, MX, TXT, and FTP record. You will reference this list repeatedly during setup.
- Valid SSL certificate on your origin server. Your origin must serve HTTPS before you configure the CDN. Without it, Full (Strict) SSL mode will fail and cause redirect loops.
- CDN provider account. Create your account and confirm you can access the dashboard before starting.
- DNS management access. Log into your domain registrar or DNS host and confirm you can edit records in real time.
- Site admin access. You need access to your CMS, server config, or hosting control panel to adjust cache headers.
Pro Tip: Test your CDN setup in staging before applying changes to your live site. A staging environment lets you catch SSL mismatches and cache errors without affecting real visitors.
If you manage WordPress hosting, inSave Hosting includes staging tools directly in the control panel, which makes this step straightforward.
How to perform CDN integration step by step
This process follows an incremental configuration approach: configure DNS and SSL first, then layer in caching rules. That order makes troubleshooting far simpler than enabling everything at once.

Step 1: Configure cache-control headers on your origin server
Correct cache-control headers at the origin are the most important factor in CDN caching behavior. Set long lifetimes for immutable assets like images, fonts, and JavaScript files. Set short or no cache for dynamic HTML pages. Without this step, the CDN will either cache content it should not or skip caching content it should serve from edge nodes.
Step 2: Create a CDN distribution or pull zone
Log into your CDN provider dashboard and create a new distribution or pull zone. Point it to your origin server's IP address or hostname. The CDN will pull content from your origin on the first request, then cache it at edge locations for subsequent visitors.
Step 3: Update your DNS records
Change your domain's CNAME record to point to the CDN's hostname. For root domains, some providers require you to update nameservers entirely. DNS propagation typically completes within a few hours, though it can take up to 48 hours globally. Do not assume propagation is complete just because your own browser shows the new version.
Step 4: Configure SSL settings
Set your CDN's SSL mode to Full (Strict). This mode requires a valid certificate on your origin server and encrypts traffic end to end. Any other mode risks either broken HTTPS or redirect loops. If your origin does not yet have an SSL certificate, get one before this step.
Step 5: Set caching rules for static vs. dynamic content
Separate your caching rules for static assets and dynamic HTML. Cache images, CSS, and JavaScript aggressively with long TTLs. Cache HTML pages cautiously or bypass caching entirely for logged-in users and checkout pages. Mixing these two categories is a common source of user experience problems after CDN activation.
Step 6: Test cache behavior and verify delivery
Send a few requests to your site and inspect the response headers. Look for cache status headers like cf-cache-status or X-Cache. A value of HIT confirms the CDN served the file from an edge node. A value of MISS means the CDN fetched it from your origin.
The table below summarizes the key configuration decisions at each step.
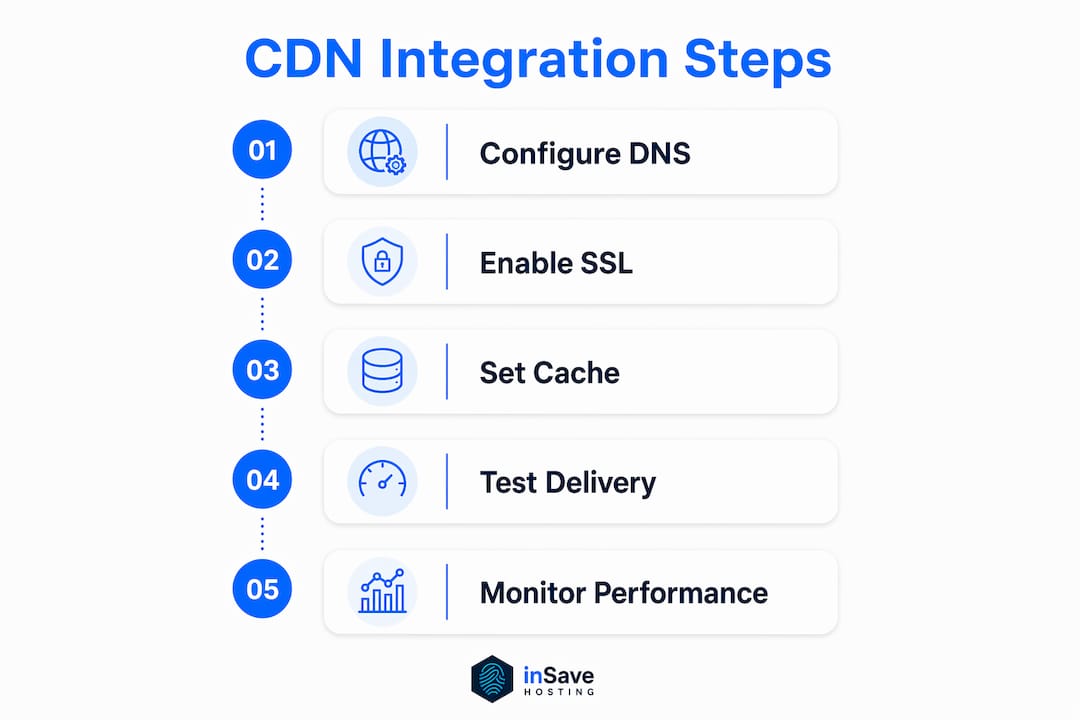
| Step | Action | Key setting |
|---|---|---|
| Cache-control headers | Set at origin server | Long TTL for static, short for HTML |
| Pull zone setup | Create in CDN dashboard | Point to origin IP or hostname |
| DNS update | Edit CNAME or nameservers | CDN-provided hostname |
| SSL configuration | Set in CDN dashboard | Full (Strict) mode |
| Caching rules | Define by content type | Static vs. dynamic separation |
| Verification | Inspect response headers | HIT/MISS and cache age |
Pro Tip: Use curl -I https://yourdomain.com/image.jpg from your terminal to inspect headers without a browser. Browsers cache aggressively and can mask a CDN MISS.
What are common challenges when integrating a CDN?
Even a careful setup hits snags. Knowing the most frequent problems in advance cuts your troubleshooting time significantly.
- SSL redirect loops. These happen when the CDN's SSL mode does not match the origin's certificate status. Full (Strict) SSL mode requires a valid origin certificate. If your origin only has HTTP, use Flexible mode temporarily, but replace it with Full (Strict) as soon as you install a proper certificate.
- Broken email delivery. When you proxy your root domain through a CDN, MX records can get disrupted. Keep MX and FTP records set to DNS-only, not proxied through the CDN. Email traffic must bypass the CDN entirely.
- Stale content after updates. If a visitor sees an old version of a file, your CDN served a cached copy. Use fingerprinted filenames for static assets, such as
style.abc123.css, so each new version gets a unique URL and bypasses the old cache automatically. - CORS errors on static assets. When static files are served from a CDN subdomain, browsers may block them due to cross-origin restrictions. Add the correct
Access-Control-Allow-Originheader at your origin server. - Incorrect edge routing. A CDN may route traffic to the wrong region if your pull zone is misconfigured. Test from multiple geographic locations using tools like GTmetrix or WebPageTest with location selection.
"The most overlooked CDN mistake is treating all content the same. Static assets and dynamic pages need completely different caching strategies. Applying one rule to everything either breaks your site or wastes your CDN entirely."
For developers working with cloud infrastructure, cloud solution providers can audit your CDN routing and origin configuration if you need a professional review.
How do you verify and monitor CDN integration?
Verification is not a one-time task. CDN behavior changes as your content changes, and monitoring catches problems before your visitors do.
- Inspect response headers. Use browser developer tools or
curlto check forcf-cache-status,X-Cache, or similar headers. A HIT confirms edge delivery. A MISS means the origin is still serving the file. - Check cache age values. The
Ageheader shows how many seconds a cached file has been stored at the edge. A high age value confirms the CDN is caching effectively. - Run speed tests before and after. Use GTmetrix or WebPageTest to compare load times from multiple regions. The performance gap between your origin location and distant regions should shrink noticeably after CDN activation.
- Monitor DNS propagation. After a DNS change, flush your local DNS cache and test from different networks. Do not rely on a single browser or device.
- Maintain a CDN runbook. Document your CDN settings, purge methods, SSL configuration, and a review schedule. When something breaks at 2 AM, a written runbook saves hours.
Pro Tip: Testing cache headers from multiple regions confirms correct edge routing. A CDN that only serves HIT responses from one continent is not doing its job globally.
For a deeper look at how caching layers interact with your hosting setup, the guide on caching in hosting covers the relationship between server-side caching and CDN behavior in 2026.
Key Takeaways
Successful CDN integration requires correct cache-control headers at the origin, Full (Strict) SSL mode, and separate caching rules for static assets and dynamic HTML.
| Point | Details |
|---|---|
| Prepare before you configure | Back up your site and document all DNS records before touching any CDN settings. |
| Cache-control headers come first | Set long TTLs for static assets and short or no cache for dynamic HTML at the origin server. |
| SSL mode must match your origin | Use Full (Strict) SSL mode only when your origin has a valid certificate to avoid redirect loops. |
| Keep MX records DNS-only | Email and FTP records must bypass the CDN proxy to prevent broken mail delivery. |
| Verify with headers, not just browsers | Use curl or developer tools to confirm HIT responses and cache age values from multiple regions. |
Why I always configure CDN in layers, not all at once
Most CDN guides tell you to flip everything on and then troubleshoot. That approach creates a debugging nightmare because you cannot isolate which change caused a problem. My approach is always incremental: DNS and SSL first, static asset caching second, and dynamic content rules only after the first two layers are confirmed stable.
The detail that trips up the most developers is SSL mode. I have seen redirect loops that took hours to diagnose because someone set the CDN to Flexible mode while the origin was already forcing HTTPS. The fix takes 30 seconds once you know what it is, but finding it without a systematic approach wastes an afternoon.
The other thing I push hard on is filename fingerprinting for static assets. Cache invalidation by purge is fine for emergencies, but fingerprinted filenames mean you never have to purge. Every deploy creates new URLs, and the old cached files simply age out. That is a much cleaner operational model than manually triggering purges after every update.
Finally, write the runbook. Not because you will forget the settings, but because the next person touching the CDN configuration might not be you. A documented CDN setup with purge instructions and SSL notes is worth more than any automation shortcut.
— Ihor
inSave Hosting makes CDN setup straightforward
Setting up a CDN does not have to mean juggling five separate dashboards. inSave Hosting bundles free CDN integration directly into its hosting plans, so DNS, SSL, and CDN configuration all live in one place.
inSave Hosting plans include free SSL certificates, LiteSpeed server technology, and built-in CDN support. That combination means you can follow the steps in this guide without sourcing each component separately. For small business owners and developers who want performance without the complexity, shared hosting plans at inSave Hosting are a practical starting point. If you need SSL coverage across multiple subdomains, inSave Hosting also offers wildcard SSL certificates to keep your entire domain secure through the CDN layer.
FAQ
What is CDN integration?
CDN integration is the process of configuring your website's DNS and origin server to route traffic through a content delivery network. The CDN caches your static assets at edge servers worldwide and serves them to visitors from the nearest location.
How long does CDN integration take?
The technical configuration typically takes one to two hours. DNS propagation after the CNAME update can take a few hours and up to 48 hours in some cases, so plan for that window before declaring the setup complete.
What SSL mode should I use with a CDN?
Use Full (Strict) SSL mode. This setting requires a valid certificate on your origin server and encrypts traffic between the CDN edge and your origin, preventing redirect loops caused by mismatched SSL configurations.
Why is my CDN showing MISS instead of HIT?
A MISS means the CDN fetched the file from your origin instead of serving a cached copy. The most common causes are missing or incorrect cache-control headers on your origin server, or a cache TTL set to zero for that file type.
Do I need to change my email DNS records when setting up a CDN?
Yes. Keep your MX records set to DNS-only and do not proxy them through the CDN. Routing email traffic through a CDN proxy breaks mail delivery because CDNs are not designed to handle SMTP traffic.