
TL;DR:
- A website staging workflow involves developing, testing, and deploying changes in a controlled environment before going live. It requires three synchronized environments: local, staging, and production, with configuration parity to prevent bugs. Following a structured, checklist-based process and automating steps reduce the risk of deployment errors and outages.
A website staging workflow is the systematic process of developing, testing, and deploying website changes through a controlled staging environment before those changes reach your live production site. The industry term for this practice is "pre-production deployment," though "staging workflow" is the phrase most professionals use day to day. Done right, this process transforms deployment into a repeatable, low-stress operation across three distinct environments: local development, staging, and production. Every website owner who has ever pushed a broken update directly to a live site understands exactly why this structure matters.
What does a website staging workflow require to set up?

A solid staging workflow depends on three environments working in sync. Local development is where you write and test code privately. Staging is a near-identical copy of your production site, accessible only to your team. Production is the live site your visitors see. Each environment has a specific role, and skipping any one of them creates risk.
Configuration parity between staging and production is the most overlooked requirement in this setup. Your staging server must match production on PHP version, database engine, caching layer, and server configuration. A mismatch here means your tests pass on staging but bugs appear on the live site. That gap defeats the entire purpose of staging.
Version control through Git is non-negotiable for any professional workflow. Every code change gets committed to a branch, reviewed via pull request, and merged before it touches staging or production. GitOps deployment using pull requests and automated CI/CD pipelines makes every change trackable, testable, and recoverable. That traceability is what gives teams confidence to deploy without fear.
Pro Tip: Choose a hosting provider that includes one-click staging creation. inSave Hosting offers built-in staging tools that clone your site files, database, and domain configuration in minutes, removing the manual setup burden entirely.
Essential tools checklist
| Tool or feature | Purpose |
|---|---|
| Git version control | Tracks every code change and enables rollback |
| CI/CD pipeline | Automates testing and deployment between environments |
| Staging environment | Mirrors production for safe pre-launch testing |
| Backup system | Creates restore points before each production deploy |
| Cache management tool | Clears server, object, and CDN caches in the correct order |
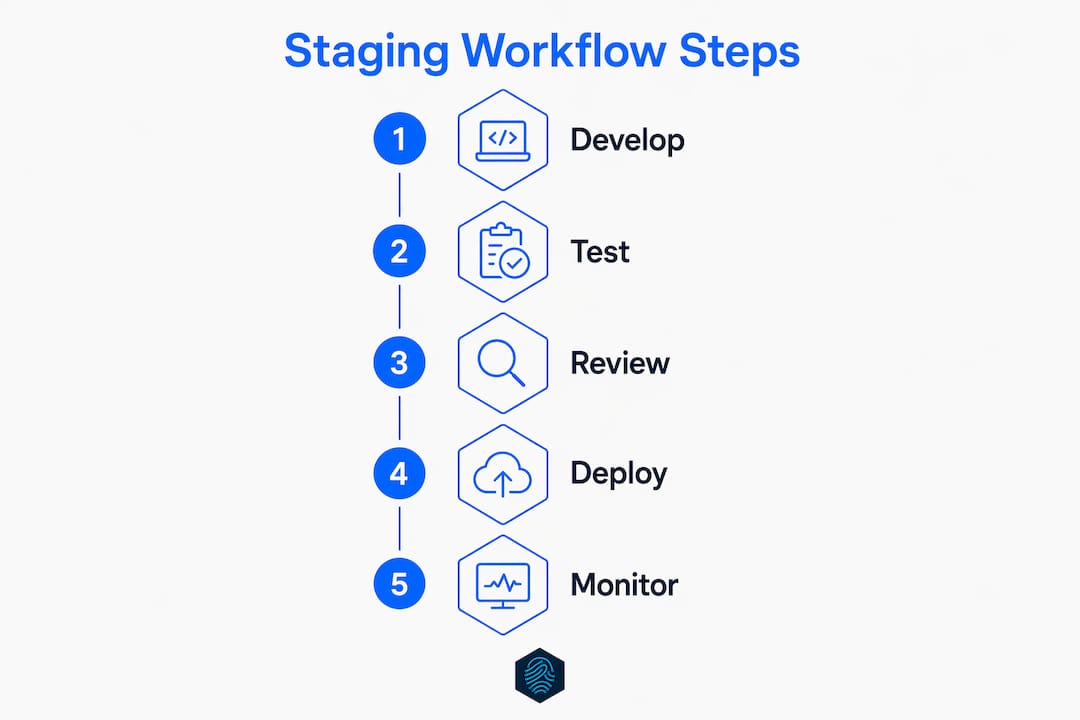
How to stage a website: the step-by-step process
A structured staging process for websites follows a clear sequence. Skipping steps, especially near the end, is where most deployment problems originate. The WordPress release workflow used by professional teams includes 10 key steps covering environment synchronization, QA, database migration, deployment, and cache clearing. That structure applies to any CMS or custom-built site.
-
Develop and commit locally. Write your changes in the local environment. Commit each logical unit of work to a feature branch in Git. Never develop directly on staging or production.
-
Push to the staging branch. Merge your feature branch into the staging branch. Your CI/CD pipeline should automatically deploy those changes to the staging server.
-
Sync the staging database. Pull a fresh copy of the production database to staging before testing. This gives you accurate, real-world data to test against.
-
Run QA and automated tests. Execute functional tests, check for broken links, and verify that forms, payments, and key user flows work correctly. Document every test result.
-
Stakeholder review. Staging environments serve not just developers but content editors, designers, and business stakeholders. Give them access to validate copy, layout, and user experience before approval.
-
Get formal sign-off. Require written approval from the relevant stakeholder before any code moves to production. A Slack message or email thread works fine. The key is a documented record.
-
Create a production backup. Back up all site files and the database immediately before deployment. This is your safety net if anything goes wrong.
-
Deploy to production. Push the approved changes through your CI/CD pipeline or hosting panel. Avoid manual file transfers, which introduce human error.
-
Clear caches in sequence. Clear caches in this order: server opcode cache first, then object cache, then CDN-level cache. Reversing this order causes stale content to persist for visitors.
-
Run smoke tests on the live site. Immediately verify that the homepage loads, critical pages render correctly, and key functions work. This is your first line of defense against production-only bugs.
Pro Tip: Schedule production deployments during your lowest-traffic window, typically between 2 a.m. and 5 a.m. local time. If something breaks, fewer visitors are affected and your team has time to respond without public pressure.
Common challenges in the staging and deployment workflow
Environment misalignment is the most common cause of post-deployment bugs. When staging runs PHP 8.1 and production runs PHP 7.4, a plugin or script that works perfectly on staging can throw fatal errors on the live site. Auditing your server configurations before every major release prevents this.
Database synchronization creates its own set of problems. Pulling stale data to staging means you test against outdated content, missing new records or schema changes added since the last sync. Always pull a fresh production database export at the start of each testing cycle, not at the beginning of the sprint.
Cache issues after deployment catch even experienced developers off guard. Visitors may see outdated pages for hours if caches are cleared in the wrong order or skipped entirely. The correct sequence, server opcode cache, then object cache, then CDN cache, is the fix. Skipping the CDN layer is the most common mistake.
Monitor your production site for 24–48 hours after every deployment. Issues like memory leaks, slow database queries, or third-party API failures often take time to surface under real traffic. Set up uptime monitoring and error logging before you deploy, not after.
Common mistakes and how to fix them:
- Skipping database sync before testing. Fix: always export production data to staging at the start of each QA cycle.
- Testing on a misconfigured staging server. Fix: audit PHP version, caching, and database settings against production before every release.
- Deploying without a backup. Fix: automate pre-deployment backups as a required pipeline step.
- Clearing caches out of order. Fix: document the correct cache-clearing sequence and add it to your deployment checklist.
- No rollback plan. Fix: use Git revisions and automated rollback triggers so you can revert within minutes.
- Skipping smoke tests on the live site. Fix: run a five-minute manual check of critical pages immediately after every deployment.
Best practices for staging sites that actually hold up
Repeatable processes beat heroic effort every time. A good deployment workflow includes backups, version-controlled deployment steps, and automated rollback options built in as first-class requirements, not afterthoughts. Teams that treat these as optional eventually face a production outage that forces them to add them anyway.
Small, incremental releases reduce risk more than any other single practice. Deploying one feature at a time means that when something breaks, you know exactly what caused it. Large batched releases make root-cause analysis slow and painful. Aim for releases that touch fewer than 20 files at a time whenever possible.
Documentation and changelogs are underrated. Every release should have a written record of what changed, who approved it, and when it went live. This record protects your team during incident reviews and helps new members understand the site's history. A simple shared document or Git tag message is enough.
Pro Tip: Structure your Git branching so that only senior team members or the site owner can merge into the production branch. This single permission rule prevents accidental deployments and enforces the review process without extra tooling.
Workflow approach comparison
| Approach | Strength | Weakness |
|---|---|---|
| Manual FTP deployment | Simple for solo sites | No rollback, high error risk |
| Git with manual deploy | Trackable changes | Still requires human trigger |
| CI/CD automated pipeline | Fast, consistent, auditable | Requires initial setup time |
| Hosting panel one-click staging | Accessible for non-developers | Less flexible for complex workflows |
Involving stakeholders beyond the development team is one of the highest-value practices in any website deployment workflow. Content editors catch copy errors that developers miss. Business owners spot UX problems that QA scripts cannot detect. Building stakeholder review into the staging sign-off step costs little time and prevents expensive post-launch corrections. You can learn more about effective stakeholder communication as part of your release process.
Key takeaways
A structured website staging workflow is the single most effective way to prevent production outages and reduce emergency fixes after deployment.
| Point | Details |
|---|---|
| Three-environment model | Maintain local, staging, and production environments as separate, clearly defined stages. |
| Configuration parity | Match PHP version, database, and cache settings exactly between staging and production. |
| Cache clearing sequence | Always clear server opcode, then object cache, then CDN cache after every production deploy. |
| Post-deployment monitoring | Watch the live site for 24–48 hours after each release to catch issues real traffic reveals. |
| Stakeholder sign-off | Require formal approval from content and business stakeholders before any code reaches production. |
Why I think most teams underestimate the staging workflow
After years of working with website owners and development teams, the pattern I see most often is this: teams invest heavily in building the site and almost nothing in the process of updating it. The first deployment goes fine because everyone is paying attention. The tenth deployment, six months later, is where things break.
The uncomfortable truth is that most staging workflow failures are not technical. They are process failures. A developer skips the database sync because they are in a hurry. A stakeholder approves changes over a phone call instead of reviewing the staging site. A backup gets skipped because "this update is small." Each shortcut feels reasonable in the moment. Together, they create the conditions for a serious outage.
What I have found actually works is treating the staging workflow as a non-negotiable checklist, not a set of guidelines. The teams with the fewest production incidents are not the ones with the most sophisticated tools. They are the ones who follow the same process every single time, regardless of how minor the update seems.
Automation helps, but it does not replace judgment. A CI/CD pipeline will deploy whatever you tell it to deploy. If you push broken code, it deploys broken code efficiently. Human review at the staging sign-off step remains the most important quality gate in the entire process. Automate the mechanics. Keep humans in the approval loop.
If you run a small site and think this level of process is overkill, consider this: a one-hour outage on a business site costs real money and real trust. A 15-minute staging review before each deployment costs almost nothing. The math is straightforward.
— Ihor
How inSave Hosting makes staging setup faster
Setting up a staging environment used to mean hours of server configuration. One-click staging setup via hosting panels now takes between 5–15 minutes to clone production data, including files, database, and domain configuration. inSave Hosting builds this capability directly into its hosting plans, so you spend time testing your site instead of configuring servers.
inSave Hosting plans include LiteSpeed, LSCache, MariaDB, PHP8, and free CDN integration, giving your staging and production environments the same technology stack from day one. That parity is exactly what reliable testing requires. Whether you run a WordPress site or a custom build, explore hosting plans designed to support professional staging and deployment workflows from the start.
FAQ
What is a website staging workflow?
A website staging workflow is the process of developing and testing site changes in a controlled staging environment before deploying them to the live production site. It typically involves three environments: local, staging, and production.
How long does it take to set up a staging environment?
Using a hosting panel with one-click staging, setup takes between 5–15 minutes to clone your production files and database. Manual server configuration takes significantly longer.
Why does configuration parity between staging and production matter?
Mismatched PHP versions, caching settings, or database configurations cause bugs that only appear on the live site, making staging tests unreliable. Matching both environments exactly is what makes staging results trustworthy.
How do I handle cache issues after deploying to production?
Clear caches in this sequence: server opcode cache first, then object cache, then CDN-level cache. Skipping or reversing this order causes visitors to see outdated content after deployment.
How long should I monitor the site after a production deployment?
Monitor the live site for 24–48 hours after every deployment. Real traffic often reveals performance issues, database errors, or third-party API failures that staging tests do not catch.