
Generate WebP versions of your images and let your server or CDN deliver them automatically to browsers that support the format, falling back to JPEG or PNG for the rest. On WordPress, a plugin like WebP Conversion handles this in minutes. On a custom stack, an nginx rewrite or an Apache mod_rewrite rule does the job. Test the result immediately with Lighthouse or a quick curl check before you trust it in production.
TL;DR:
- Using pre-generated WebP images stored alongside originals with server rewrites offers the best efficiency and reliability for most setups.
- WordPress plugins and CDNs with built-in negotiation are the fastest to implement, but pre-generated files save server resources under heavy load.
- Proper server configuration requires a
Vary: Acceptheader to prevent cache poisoning when serving WebP through nginx or Apache rewrites.- A safe rollout involves staging conversions first, verifying image rendering, and keeping original files until confirming no issues after several days of traffic.
- Testing with Chrome DevTools, Lighthouse, and command-line
curlconfirms correct delivery of WebP, with fallback support for browsers that do not support the format.
Table of Contents
- How Do You Serve WebP Images to Browsers That Support Them?
- WordPress Implementation: Plugins, Server Requirements, and a Safe Workflow
- Server-Level Patterns for Nginx and Apache
- Frameworks and CDNs: Letting the Platform Handle It
- How Do You Test and Verify WebP Delivery?
- Best Practices That Keep WebP From Breaking Your Site
- Ihor's Perspective: A Hosting Checklist for Enabling WebP Safely
- When Should You Add AVIF Instead of Relying on WebP Alone?
- How inSave Hosting Makes WebP Rollouts Less Risky
- Sources
- FAQ
How Do You Serve WebP Images to Browsers That Support Them?
Four methods dominate real-world setups, and picking the wrong one for your stack wastes time you don't have.
Pre-generated files plus server rewrite is the workhorse pattern. You convert every image to WebP once, store both versions side by side, and let nginx or Apache decide which file to hand back based on the browser's Accept header. It's the lowest-runtime-cost approach because the server never converts anything on the fly. It also survives plugin updates and theme changes, since the logic lives at the web server layer, not in your CMS.
On-the-fly server conversion trades setup simplicity for CPU cycles. Some server modules convert images the first time they're requested, then cache the result. It works, but it adds latency on that first request and depends on image libraries like Imagick or GD being properly configured.
CMS or plugin delivery is the fastest path for WordPress site owners who don't want to touch a config file. A plugin intercepts uploads, converts them, and serves the WebP version through WordPress SEO Automation markup or server directives.
Framework and CDN automatic negotiation covers Next.js, Nuxt, and most image CDNs, which read the Accept header and serve AVIF, then WebP, then the original, all cached after the first hit.
- Fastest to implement: a WordPress plugin or a CDN with built-in format negotiation.
- Best runtime efficiency: pre-generated files with a server rewrite, since there's no conversion overhead per request.
- Best for teams shipping a Next.js or similar app: the framework's built-in image optimizer.
If you're stuck choosing between adjusting your current hosting configuration and switching providers, the deciding factor is usually whether your host gives you access to Imagick, GD, and server-level config at all. Some budget shared hosting plans lock those down.
WordPress Implementation: Plugins, Server Requirements, and a Safe Workflow
WordPress plugins fall into two camps. On-upload converters create a WebP copy the moment you add an image to the media library, so every new upload is covered going forward. Bulk converters scan your existing media library and generate WebP versions for images already on your site, which matters if you're retrofitting a site with years of content.
Plugins like WebP Conversion, Only WebP Uploads, Sasim WebP Auto Converter, and MediaHue WebP Converter cover both jobs, and their feature lists are worth comparing line by line before you install one. Look specifically for:
- Bulk conversion with a progress indicator, not just on-upload support.
- A restore-originals or keep-originals option, in case a conversion goes wrong.
- WooCommerce and Advanced Custom Fields (ACF) compatibility, since product galleries and custom image fields often sit outside the standard media library.
- WP-CLI support, useful if you're managing hundreds of posts and want to script the conversion instead of clicking through an admin screen.
- Whether the plugin uses an external API for conversion or does everything locally on your server.
Before any of that works, your server needs Imagick or GD compiled with WebP support. Without one of those extensions, the plugin has no way to actually generate the files, and you'll see conversion errors instead of a smaller media library. Check your PHP version too. Most current plugins expect PHP 7.4 or higher, and PHP8 gives you a meaningful performance bump on top of that.
The safe rollout order looks like this: install and activate the plugin on a staging copy of your site first. Run the bulk conversion there and check that images render correctly across a few different page types, including product pages if you run WooCommerce. Once you're confident, repeat the process on production, and keep the plugin's "keep originals" setting on until you've verified delivery for at least a few days. Only delete original files after you're certain nothing external, like an RSS feed or an embedded post, still points to the old file names.
Pro Tip: Run the bulk conversion during low-traffic hours the first time. Converting thousands of images can spike CPU usage on shared hosting plans, and you don't want that competing with live visitor requests.
Server-Level Patterns for Nginx and Apache
If you manage your own server config, content negotiation happens before WordPress or any CMS ever gets involved.
On nginx, the standard pattern uses a map directive that reads the incoming Accept header and sets a variable, commonly $webp_suffix, to .webp when the browser supports it and to an empty string otherwise. Then a try_files rule checks for a .webp sibling of the requested image before falling back to the original file. If someone requests photo.jpg and their browser accepts WebP, nginx quietly serves photo.jpg.webp instead, and the browser never knows the difference.
On Apache, the same logic runs through mod_rewrite. A rewrite condition checks the Accept header for image/webp, then checks whether a .webp version of the requested file exists on disk, and rewrites the request to that file only if both conditions pass.
Both approaches share one non-negotiable requirement: the response must include a Vary: Accept header. Without it, a caching layer or CDN in front of your server might store the WebP response and then serve it to a browser that doesn't support WebP, or vice versa. That's a real cache poisoning risk, and it's one of the most common mistakes in DIY WebP setups. Vary: Accept tells every cache in the chain to store separate copies keyed on what the browser actually accepts.
- Use
mapandtry_fileson nginx to prefer.webpsiblings without touching application code. - Use
mod_rewriteconditions on Apache to check theAcceptheader and file existence before rewriting. - Always pair either pattern with
Vary: Acceptat the server level. - Prefer pre-generated files over on-the-fly conversion modules unless your image set changes constantly and disk space is tight.
Pre-generating wins in almost every case because it removes conversion from the request path entirely. On-the-fly modules make more sense only when you're dealing with user-generated content arriving faster than a batch job can keep up.
Frameworks and CDNs: Letting the Platform Handle It
Modern frameworks increasingly treat format negotiation as a built-in feature rather than something you configure by hand. Next.js's image optimizer reads the browser's Accept header and serves AVIF first, WebP second, and the original format last, caching each converted version after the first request so subsequent visitors get an instant response.
Image CDNs extend the same idea beyond a single framework. They sit in front of your origin server, convert and cache formats on demand, and free you from managing conversion logic yourself. That's attractive if you're already offloading images to a CDN for caching and bandwidth reasons.
A few things to watch:
- If your CDN or framework pulls images from remote sources, configuring
remotePatterns(or the equivalent allowlist) matters for security, since you don't want your optimizer fetching from arbitrary URLs. - Set accurate
sizesand use apriorityflag on your Largest Contentful Paint (LCP) image so the browser doesn't wait on a low-priority queue for the image visitors see first. - Static-site generation and server-side rendering behave differently here. Statically generated pages may need images pre-optimized at build time, while server-rendered pages can convert on request.
How Do You Test and Verify WebP Delivery?
Configuration that looks correct on paper can still fail silently, which is why verification matters as much as the setup itself.
- Open Chrome DevTools, go to the Network tab, reload the page, and check the
Content-Typecolumn for your images. It should readimage/webpfor browsers that support it. - Run a Lighthouse audit and check the "Serve images in next-gen formats" flag. If it still fires after your changes, something in your rewrite or plugin config isn't matching.
- Test from the command line with
curl -H "Accept: image/webp" -I https://yoursite.com/photo.jpgand confirm the response header showsContent-Type: image/webp. - Repeat the same
curlcommand without theAccept: image/webpheader and confirm you get the original format back, plus aVary: Acceptheader in both responses. - If the WebP response ever comes back for a request that didn't ask for it, or the fallback stops working after a CDN purge, that's a sign your cache is storing one variant under both keys, a cache-poisoning symptom worth fixing immediately.
If a test fails, the usual culprits are a missing Vary header, a CDN caching layer that isn't aware of content negotiation, or a plugin that only converts new uploads and never touched your existing media library.
Best Practices That Keep WebP From Breaking Your Site
Keep originals on disk until you've run every test above and watched the site under real traffic for a few days. Deleting source files too early leaves you with no rollback if a plugin update or a bad conversion batch corrupts your WebP files.
- Set
Vary: Acceptand sensibleCache-Controlheaders on every image response, not just the WebP ones. - Use a cwebp quality setting around
-q 82as a starting balance between file size and visual fidelity, adjusting down slightly for photo-heavy pages and up for graphics with sharp edges. - Apply a "size guard": if the converted WebP file comes out larger than the original, keep the original and skip the conversion for that image.
- Before deleting any original file, check for external references. RSS feeds, embedded posts, and third-party links often point directly at old file names.
Pro Tip: Keep a spreadsheet or simple log of which images you've bulk-converted and when. If a visual regression shows up two weeks later, you'll want to know exactly which batch to check first.
Ihor's Perspective: A Hosting Checklist for Enabling WebP Safely
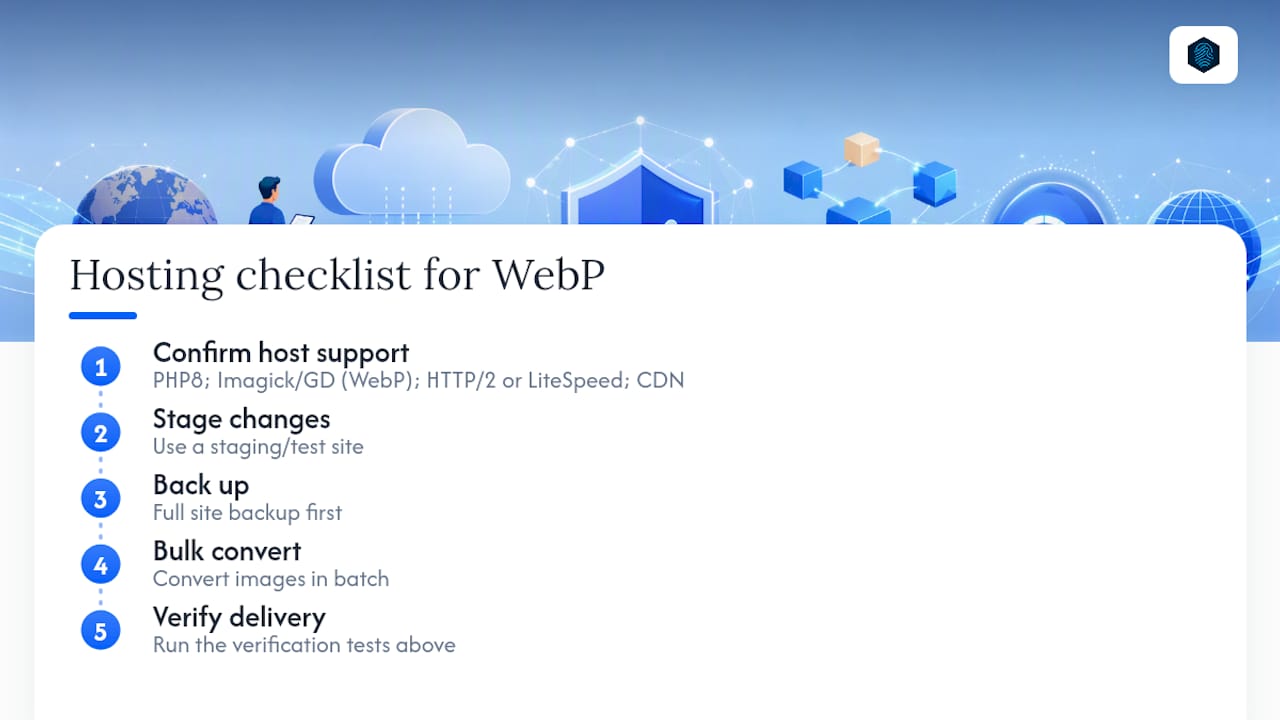
Before touching a plugin or a rewrite rule, confirm your host actually supports the work: PHP8, Imagick or GD with WebP compiled in, HTTP/2 or LiteSpeed, and CDN integration for caching converted files. Then stage the change, back up first, run your bulk conversion, and verify with the tests above. For a deeper look at what else affects load times beyond image format, see this speed optimization guide.
When Should You Add AVIF Instead of Relying on WebP Alone?
WebP typically cuts file size noticeably versus JPEG; AVIF often pushes that reduction further, but with narrower browser support and heavier encoding time. Prioritize WebP first since it covers the vast majority of visitors, then layer in AVIF where your framework or CDN handles it automatically. Watch for visual artifacts after either rollout.
— Ihor
How inSave Hosting Makes WebP Rollouts Less Risky
Everything in this guide depends on your server actually supporting the work: Imagick or GD compiled with WebP, PHP8, and a caching layer that respects Vary: Accept instead of fighting it. Some hosting providers offer technology stacks with LiteSpeed and LSCache, free CDN integration, and staging tools that let you run a bulk conversion on a copy of your site before touching production.

That staging environment matters more than it sounds. A bad batch conversion or a misconfigured rewrite rule can quietly break image delivery site-wide, and catching it before it hits live visitors saves you a support ticket and a traffic dip. Automated backups allow restoration of originals in minutes if a conversion goes wrong, and one-click WordPress installs make it simple to test a WebP plugin without touching your live database. If you're planning a WordPress-specific rollout, the WordPress hosting plans include the PHP and server configuration this guide assumes, so you can skip the guesswork and start converting images today.
Sources
- Web
- Serve WebP with NGINX: Automatic Content Negotiation Guide
- Wordpress
- How to Implement WebP in Next.js with next/image
FAQ
How Do I View a WebP Image?
Most current browsers, including Chrome, Firefox, Edge, and Safari, display WebP images natively, so opening one in a browser tab works without any extra software. On desktop, most modern image viewers and photo editors also support WebP directly.
How Do I Convert a WebP File to JPEG?
Use the command-line tool cwebp's counterpart, dwebp, or open the file in an image editor that supports WebP and export it as JPEG. Several free online converters handle single-file conversions if you don't want to install anything.
What Are the Disadvantages of Using WebP?
WebP conversion adds a processing step to your workflow, and some older browsers and email clients still don't render it, which is why a fallback to JPEG or PNG remains necessary. Certain highly detailed photographic images can also see quality loss at aggressive compression settings if you skip the size guard check described above.
Which Browsers Support WebP Images?
Chrome, Firefox, Edge, Safari, and Opera all support WebP in their current versions, covering the large majority of web traffic today. Content negotiation with a Vary: Accept header handles the remaining older browsers automatically by serving them the original JPEG or PNG.