
For most site owners, the safest way to migrate WordPress to a new host is a host-assisted migration or a trusted plugin like Duplicator or All-in-One WP Migration. Save manual transfers for large or custom setups. A migration counts as successful only when the site loads on the new server, no files or database rows went missing, SSL works, and forms and checkout still function. Keep the old host active until every check passes.
TL;DR:
- Using host-assisted migration or trusted plugins minimizes manual effort and reduces the risk of missing files or database errors during migration.
- Always verify server compatibility, disk space, and plugin requirements before starting, and lower DNS TTL in advance to speed up propagation.
- Manual migration is reserved for complex sites with large data or custom server configurations, requiring advanced technical skills.
- Testing on a staging environment is essential to catch issues with forms, SSL, and third-party integrations before updating DNS records.
- Keep the old host active until after the final DNS update and thorough testing to ensure a quick rollback if problems arise.
Table of Contents
- How Do You Prepare to Migrate a WordPress Site?
- Which WordPress Migration Method Should You Use?
- What Are the Exact Steps to Migrate a WordPress Site?
- What Should You Test Before Switching DNS?
- How Do You Cut Over DNS and Roll Back If Something Breaks?
- What Comes After Migration to Protect SEO and Site Health?
- What Happens to Email Accounts When You Change Hosts?
- Do You Need to Fix File Permissions After Migration?
- How Do You Keep a Migrating Site Online With Minimal Downtime?
- What Should You Clean Up on the New Host for Better Performance?
- What Is Your Backup Plan If the Migration Fails?
- What Actually Trips Up Most WordPress Migrations
- Let inSave Hosting Handle the Move for You
- Where to Learn More About WordPress Migration
- Sources
- FAQ
How Do You Prepare to Migrate a WordPress Site?
Skipping prep work is how a two-hour migration turns into a two-day emergency. Before you touch anything, build a complete offsite backup of your files and database, then store it somewhere other than the old server. This matters more than it sounds: a backup sitting only on the account you're leaving is one support ticket away from disappearing if the old host suspends or wipes that account mid-transfer, a risk The SSL Store's migration guidance flags directly.
Once the backup is safe, check whether the destination server can actually run your site. A plugin gallery or custom theme built for PHP 8.1 will not behave well on an older stack, and mismatched MySQL versions can cause import errors that look like corruption but aren't.
Before you migrate, confirm on the new host:
- PHP and MySQL/MariaDB versions match or exceed what your current site requires
- Available disk space covers your full backup plus room to unpack it
- Upload limits and required PHP extensions (like
mbstringorimagick) are enabled - You have working control panel, SFTP/SSH, database, and domain registrar logins in one place
- Any security plugin or firewall on the old site is temporarily disabled so it doesn't block the export
Two more things pay off later. First, lowering your domain's DNS TTL (time to live) well in advance of cutover can help if you need to point traffic back and forth, enabling faster propagation of changes. Second, pick a low-traffic window for the actual switch, like early Sunday morning for most small business sites.
Pro Tip: Screenshot or export your current plugin list and their version numbers before you start. If something breaks after migration, you'll know exactly what to roll back instead of guessing.
Which WordPress Migration Method Should You Use?
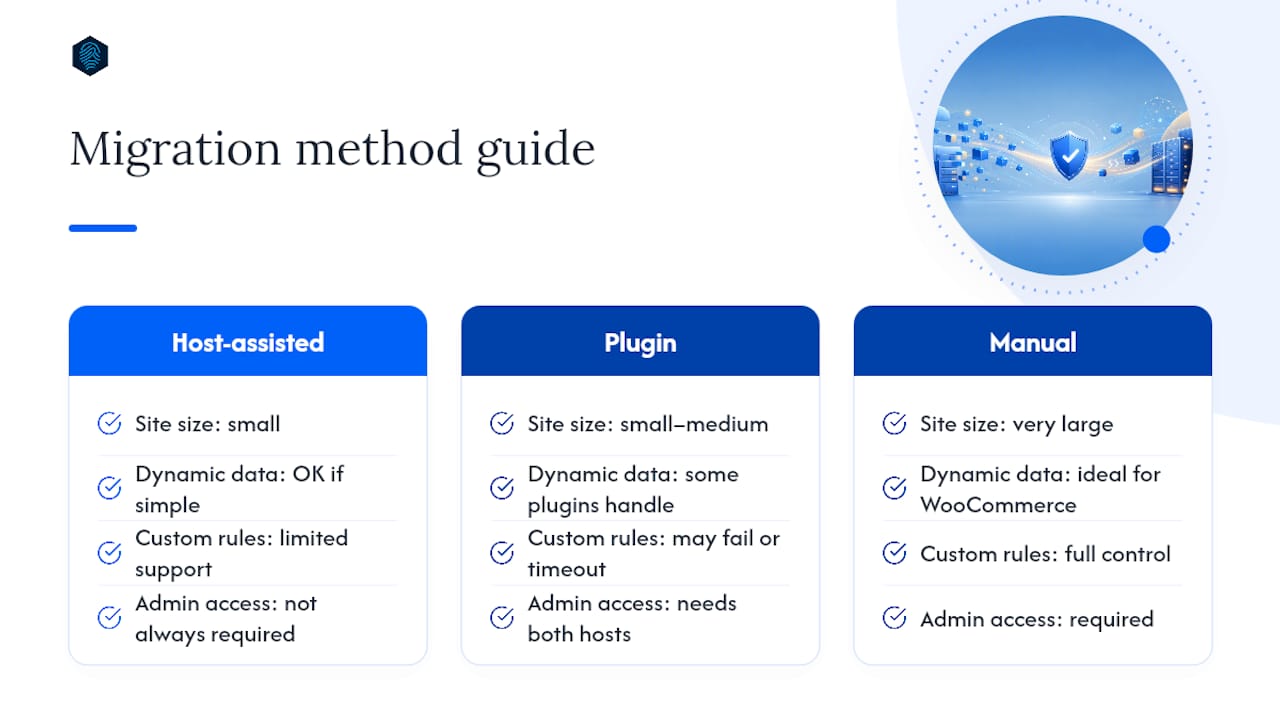
The right method depends on your site's size, complexity, and how much manual work you're willing to do. There are three real options, and picking the wrong one is the single biggest reason migrations drag on.
Host-assisted migration means your new hosting provider moves the site for you. It's the lowest-effort option because the host already knows its own server environment and can sidestep configuration mismatches you'd otherwise have to troubleshoot yourself. This tends to be the best fit for small business sites, blogs, and anyone without server experience.
Migration plugins are the fastest do-it-yourself route for small to medium sites. Tools like Duplicator package your entire site, files and database together, into a single archive you unpack on the new server, which Duplicator's own documentation notes can work even on a completely empty install without manual FTP or database setup. Others, like All-in-One WP Migration or UpdraftPlus, follow a similar export/import pattern. Plugins are genuinely the easiest method for most people, since manual transfers can eat up hours that an automated import handles in minutes, according to a comparison of leading migration plugins. The catch: free versions often cap export file size, some hosts throttle large uploads, and features like scheduled backups or multisite support usually sit behind a premium tier.
Manual migration is the fallback for sites that break the other two methods: very large media libraries, WooCommerce stores with thousands of orders, custom server-level rules (think custom Nginx configs or cron jobs), or cases where a plugin simply times out. It gives you full control but demands comfort with SFTP, phpMyAdmin, and editing configuration files directly.
Decide based on four questions: How big is the site? Does it run WooCommerce or other dynamic data? Are there custom server rules tied to the old environment? And do you have admin-level access to both hosts? Answer "complex" to two or more, and manual or host-assisted beats a plugin.
What Are the Exact Steps to Migrate a WordPress Site?
This workflow works whether you're using a plugin or going fully manual. The steps stay the same; only the tools change.
-
Back up everything, twice. Create a full offsite backup of your files and database, and keep at least two copies in different locations. Don't proceed until you've verified the backup actually opens and contains real data, not just a file that exists.
-
Prepare the destination. Set up an empty site or staging environment on the new host with matching PHP and database versions. Create the new database and a database user with full privileges, and write down the exact database name, username, and password.
-
Transfer the files and database. For small sites, a plugin import handles both at once. For manual transfers, use an SFTP client such as FileZilla to copy files, then export the database through phpMyAdmin or WP-CLI and import it on the new server. Don't forget hidden files like
.htaccess, they're easy to miss because file managers often hide them by default, and losing yours means broken permalinks. -
Update
wp-config.php. Edit the database name, username, password, and host value to match the new server. Double-check the table prefix matches what's actually in your imported database, and confirm the authentication keys and salts are present, according to WordPress's own migration documentation. -
Run a URL search-replace if the domain changed. Tools like WP-CLI's
search-replacecommand or the Better Search Replace plugin exist because WordPress stores plugin settings, widget data, and page builder content as serialized strings. A plain text find-and-replace corrupts those strings by changing their character count without updating the length header stored alongside them, which is exactly the kind of database-aware handling WordPress's developer resources recommend a proper tool for. -
Recreate cron jobs and reactivate licenses. Scheduled tasks (like WooCommerce cart cleanup or SEO plugin scans) don't always transfer automatically, especially in manual moves. Rebuild any server-level cron jobs and re-enter license keys for premium plugins and themes so they reconnect to their update servers.
-
Preview before touching DNS. Use a hosts file edit, a staging subdomain, or your new host's built-in preview URL to load the site as if it were live, without changing anything public-facing yet. Click through the whole site before you go anywhere near DNS.
Pro Tip: If your site uses WooCommerce, do a full test purchase on the staging preview using a test payment gateway before you cut over. A missing plugin dependency that only triggers at checkout is the most common migration surprise nobody catches until a customer does.
What Should You Test Before Switching DNS?
Testing on the preview environment is where you catch problems while they're still invisible to visitors. WP Remote's migration framework treats verification as its own phase, separate from the transfer itself, and that separation is exactly why migrations succeed or fail.
Work through this list on the staging preview:
- Homepage, key landing pages, and main navigation load without errors
- Contact forms submit and deliver notification emails
- Login, account pages, and (if applicable) checkout complete a full test transaction
- Search, file uploads, and image display all function normally
- Scheduled tasks and cron-dependent features run on schedule
Also check the browser console for JavaScript errors and confirm SSL issues on the preview domain, since a certificate mismatch here often signals mixed-content problems waiting on the live domain. Verify email authentication records (SPF, DKIM, DMARC) and third-party integrations like your CDN, analytics, and payment gateway are still connecting correctly. Set one clear rule before you start: if checkout or contact forms fail on preview, that's your rollback trigger. Don't cut DNS until it passes.
How Do You Cut Over DNS and Roll Back If Something Breaks?
Lowering your TTL to around 300 seconds roughly 48 hours ahead of the switch speeds up propagation, though it's worth remembering this is advisory, not a guarantee. Some internet service providers and DNS resolvers cache records longer than they're told to regardless of what TTL you set.
When you're ready to cut over:
- Change only the A or CNAME records that point your domain to the web server
- Leave nameserver settings alone unless the new host specifically requires a change
- Keep MX, TXT, and SPF records untouched unless you're intentionally moving email hosting too
- Monitor both old and new servers for traffic during the propagation window, which can take anywhere from a few minutes to several hours
If something goes wrong after cutover, rollback is straightforward as long as the old host is still active: point the A record back to the old server's IP address, or restore your DNS zone file to its previous state. This is exactly why you don't cancel the old hosting account until the new site has been fully verified and stable for at least a few days.
What Comes After Migration to Protect SEO and Site Health?
The technical move is finished, but rankings and traffic depend on what happens in the next 24 to 48 hours. If the domain changed, verify every 301 redirect from old URLs to new ones and confirm canonical tags point where they should, then submit your sitemap in Google Search Console and watch for crawl errors over the following week, following the redirect guidance in Learn WordPress's migration lesson.
Confirm SSL is active sitewide and scan for mixed-content warnings, since a page loading over HTTPS with one image still calling http:// will throw browser warnings that scare off visitors. Reconnect your CDN and caching layer to the new server, since these often need re-pointing rather than automatically following the migration.
| Task | Why it matters |
|---|---|
| Enable host backups + fresh offsite copy | Protects against post-migration data loss |
| Turn on uptime and analytics monitoring | Flags problems before users report them |
| Update hard-coded URLs in theme/plugin settings | Prevents broken links and asset errors |
| Re-issue software licenses | Restores automatic updates and support |
| Remove migration/staging plugins | Reduces attack surface and page bloat |
Removing leftover migration plugins matters more than it seems. Many carry admin-level database access, and leaving one installed after the job is done is an unnecessary security hole.
What Happens to Email Accounts When You Change Hosts?
If your email addresses run through the same hosting account as your website, like you@yourdomain.com hosted directly on the old server, migrating the site doesn't automatically move the mailboxes. Email lives in a separate system on most hosts, even when it's billed under the same plan.
Before you cut over DNS, decide whether email is moving too. If it is, export mailboxes using IMAP (a protocol that syncs mail rather than just downloading it) so you keep folder structure and read/unread status intact, then set up matching accounts on the new server and import the messages before switching MX records. Change MX records only when the new mail server is fully configured and tested, since switching too early sends new messages into a mailbox that doesn't exist yet.
If email is staying where it is, either because you use a third-party provider like Google Workspace or you're intentionally leaving mail on the old host, leave the MX, SPF, and TXT records exactly as they are during the website's DNS cutover. This is a common mistake: someone changes nameservers wholesale instead of just the A record, and email stops working even though nothing about the mail setup needed to change.
Test sending and receiving from the new configuration before you consider the move complete, and check that SPF and DKIM records still validate. A broken SPF record after migration is invisible until customer emails start landing in spam folders.
Do You Need to Fix File Permissions After Migration?
File ownership and permissions often get scrambled when moving between servers, especially with manual SFTP transfers, and this is a quiet cause of "my site looks broken" tickets that have nothing to do with the actual migration.
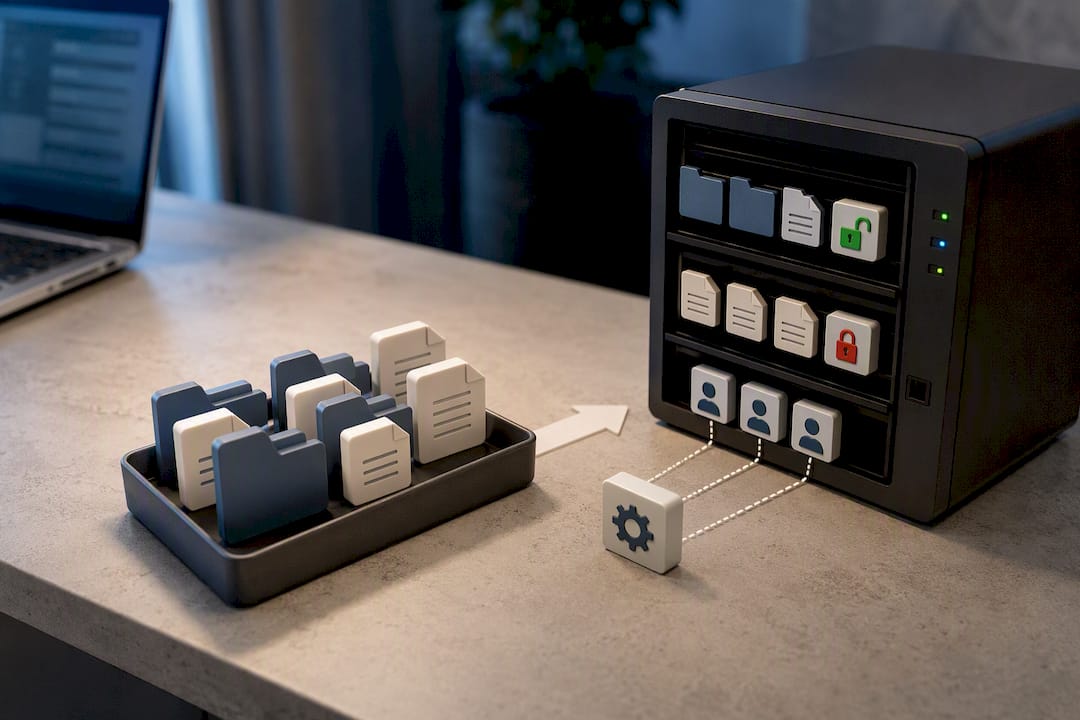
WordPress has standard permission recommendations: directories should generally be set to 755 and files to 644, with wp-config.php tightened to 440 or 600 where the server configuration allows it. If permissions are too loose, that's a security risk. Too strict, and WordPress can't write to its own uploads folder or install updates.
Symptoms of a permissions problem are specific: image uploads fail silently, plugin or theme installs error out, or you get a blank white screen when trying to save settings. If any of these show up right after migration, permissions are the first thing to check, not the last.
Ownership matters just as much as permission numbers. On most shared hosting setups, files need to be owned by the same user account that PHP runs as, not by "root" or by whatever user your SFTP client defaulted to during transfer. Ask the new host's support team what user and group your account runs under if you're not sure, since guessing wrong here can lock you out of your own files.
Run a permissions check within the first hour after transfer, not days later. Catching a permissions mismatch before you announce the migration to anyone means fixing a two-minute problem instead of explaining a broken contact form.
How Do You Keep a Migrating Site Online With Minimal Downtime?
Downtime during migration is largely avoidable, and the fix is sequencing, not luck. The biggest lever is timing: schedule the cutover for your lowest-traffic window, checked against your own analytics rather than assumed, since "low traffic" for a B2B tool looks nothing like "low traffic" for a retail site.
Put the old site into maintenance mode only during the final data sync, not for the whole migration. A maintenance mode plugin or a simple .maintenance file shows visitors a friendly holding page instead of a half-broken site while you complete the last database export, and it should stay active for minutes, not hours.
The real downtime killer is doing your testing on a preview environment before DNS ever changes, exactly as covered above. Because the new site is fully built, tested, and verified before it goes live, the DNS switch becomes the fast part instead of the risky part. Most well-planned migrations using this sequence see downtime measured in the minutes it takes DNS to propagate, not hours of a broken site.
If your site takes orders or bookings, consider a short freeze on new transactions during the final sync window specifically, rather than the whole migration, so nothing gets lost between the old database's last snapshot and the new site going live.
What Should You Clean Up on the New Host for Better Performance?
A fresh server is the right moment to clean house, not just replicate the old setup exactly. Start by checking your caching configuration; if the new host runs a stack like LiteSpeed with LSCache, enable it rather than relying solely on a plugin-based cache, since server-level caching typically outperforms plugin-only solutions.
Audit your plugin list while you're in there. Migrations tend to drag along plugins nobody remembers installing, including old SEO tools, abandoned page builders, or a security plugin now duplicated by something the new host provides natively. Deactivate and delete anything you can't justify keeping.
Compress and resize images if you haven't already; oversized media is one of the most common load-time drags on a migrated site, and tools built into most modern hosting dashboards can batch-optimize an entire media library in minutes. Check your database for leftover post revisions and spam comments too, since a bloated database slows down every query the site runs, migrated or not.
Finally, confirm HTTP/2 or newer protocols are active and that your PHP version matches the highest one your theme and plugins officially support, generally PHP 8.1 or higher for current WordPress releases. Running an outdated PHP version on a brand-new server defeats half the point of switching hosts in the first place.
What Is Your Backup Plan If the Migration Fails?
A rollback plan isn't pessimism, it's the difference between a bad afternoon and a bad week. Decide your rollback triggers before you start, not after something breaks: if checkout fails, if the database won't import cleanly, or if critical pages 500 error, those are "stop and revert" signals, not "keep pushing" ones.
The mechanics of rollback are simple as long as you followed the prep steps. Because the old host stays active and untouched until verification passes, reverting DNS records to point back at the old server's IP address restores the working site almost immediately once propagation catches up. This is exactly why canceling the old hosting account early is one of the costliest migration mistakes.
If the failure happened mid-transfer, before DNS ever changed, the fix is even simpler: your live site never moved, so you troubleshoot the new environment in isolation without any visitor-facing impact. Restore your verified offsite backup to a fresh destination environment and start the transfer again, this time knowing exactly what tripped the process the first time.
Document what failed. A migration that fails once for a fixable reason, like a PHP version mismatch or a missing extension, tends to succeed cleanly on the second attempt once that specific gap is closed.
What Actually Trips Up Most WordPress Migrations
The failures that eat the most time are rarely dramatic. A plugin export silently caps out at a server's upload limit. A .htaccess file gets skipped because a file manager hides dotfiles by default. A DNS zone still has a stale record from three hosts ago, quietly conflicting with the new setup. None of these show up until something's already broken.
Migration and staging tools exist because of patterns like these; free migration support and a staging environment let you test the transferred site against the new server's actual PHP and database versions before anything goes live, catching mismatches while they're still invisible to visitors.
For a typical small business site, budget a short amount of time for a plugin-based move and a typically quicker turnaround for a host-assisted transfer. If you're asking a host for migration help, have SFTP or control panel access, database credentials, and DNS management ready to hand over. That's the whole list, and having it prepared upfront is usually what separates a same-day migration from one that stalls for a week.
— Ihor
Let inSave Hosting Handle the Move for You
If reading through backup verification, wp-config edits, and DNS propagation windows sounds like more than you want to manage yourself, that's precisely the gap inSave Hosting's free migration service is built to close. Instead of juggling SFTP clients and phpMyAdmin exports on your own, the migration team handles the file transfer, database move, and configuration updates, while you keep working on the actual site.
To request a host-assisted migration, you'll need admin access to your current site, SFTP or control panel credentials, and DNS management access for your domain, the same short list covered above. Most small business sites move within a day once those details are in hand. The plans themselves run on WordPress-optimized hosting with free SSL certificates, staging environments for testing before anything goes live, and one-click WordPress management built into a single dashboard.
The honest case for using it isn't pressure, it's time. You skip the configuration troubleshooting, the permission fixes, and the DNS guesswork, and you get a second set of eyes checking the destination environment before your site depends on it. Check current shared hosting plans or start a migration request through inSave Hosting today.
Where to Learn More About WordPress Migration
For deeper technical reference beyond this guide, WordPress's own documentation covers edge cases like multisite migrations and advanced wp-config.php settings in detail.
- Moving WordPress — WordPress Developer Resources
- Migrating your site Part 1: Changing to a new host and domain — Learn WordPress
- Top 7 backup plugins for Elementor sites
- Website migration checklist: move sites without traffic drops
Sources
- Moving WordPress — WordPress Developer Resources
- Migrating your site Part 1: Changing to a new host and domain — Learn WordPress
- WordPress backup and restore best practices — The SSL Store
FAQ
Why Are People Moving Away From Certain WordPress Hosts?
Site owners typically switch hosts over slow load times, poor support response, rising renewal prices, or outgrowing shared resources, not because of WordPress itself. The platform stays the same; the hosting environment underneath it is usually what needs to change.
Is All-in-One WP Migration Free to Use?
The core All-in-One WP Migration plugin is free for standard export and import, though larger file transfers and certain premium extensions require a paid add-on. Check the file size limit on your specific site before relying on the free tier for a large media library.
How Do You Migrate WordPress Manually Without a Plugin?
Manually migrating means backing up files and database, transferring both via SFTP and phpMyAdmin or WP-CLI to the new server, updating wp-config.php credentials, and running a database-aware search-replace if the domain changed, following the sequence in WordPress's own developer documentation.
Can You Transfer Your Website to a Different Hosting Provider?
Yes, and it's a routine process: you back up your current site, transfer the files and database to the new server, update configuration settings, and switch DNS once everything's tested. Services like inSave Hosting's free migration handle this transfer directly if you'd rather not manage the technical steps yourself.
How Long Does a WordPress Migration Usually Take?
Migration timing varies by site size and method; plugin-based moves for smaller sites can be completed within a few hours, and host-assisted migrations often finish quickly after access credentials are provided. DNS propagation time varies widely depending on TTL and other factors.