
Yes, you can use SSH on shared hosting, but almost every provider gives you an account-level shell, not root. That's the trade-off of sharing a server with other customers, and it's actually enough for the file management and command-line work most people need.
The fastest path: log into cPanel, open Security → SSH Access, enable or request it, generate a key pair (or use your password for a quick test), then connect with ssh username@yourdomain.com -p 22. cPanel documents this workflow directly for SSH access, and once it's on, you're in a real terminal inside your account's sandbox.
Here's what that one-minute path looks like in practice:
- Check cPanel for an SSH Access or Manage SSH Keys icon.
- Enable it, or submit a quick support request if the option isn't visible.
- Generate a keypair with
ssh-keygen(OpenSSH) or upload one you already have. - Connect using
ssh user@host -p port, swapping in your actual port if your host uses a nonstandard one.
Pro Tip: If your host is inSave Hosting, SSH access on shared plans is managed through the same cPanel dashboard you already use for email and databases, so there is nothing new to learn beyond the SSH steps themselves.
Key Takeaways
Shared hosting SSH access gives you a secure, account-level command line for file management, but root access always requires moving up to a VPS or dedicated server.
| Point | Details |
|---|---|
| Check before enabling | Look in cPanel under Security → SSH Access to confirm whether SSH is already active on your account. |
| Use keys over passwords | Generate a keypair with ssh-keygen or PuTTYgen, then authorize the public key in cPanel's Manage SSH Keys panel. |
| Expect account-level limits | Shared hosting SSH runs in a restricted shell with no root, no sudo, and capped CPU/memory resources. |
| Fix errors methodically | Match each error (permission denied, connection refused, host key mismatch) to its likely cause before contacting support. |
| Choose a host that supports it well | inSave Hosting includes SSH access, cPanel key management, and free migration on its shared hosting plans. |
Table of Contents
- How to Check Whether Your Shared Hosting Account Already Has SSH Access
- How to Enable SSH on Shared Hosting Through cPanel
- Generate SSH Keys and Authorize Them in cPanel
- Connecting From Linux, macOS, Windows, and PuTTY
- Useful Basic SSH Commands for File and Account Management
- Security Limits on Shared Hosting and When to Upgrade
- Fixing Common SSH Connection Errors
- Best Practices for Managing and Rotating SSH Keys
- Checking and Configuring Firewall Settings That Block SSH
- Understanding cPanel's SSH Timeout and Session Settings
- Transferring Files Securely With Graphical SFTP Clients
- Sources
- FAQ
How to Check Whether Your Shared Hosting Account Already Has SSH Access
Log into cPanel and look under Security for an icon labeled "SSH Access" or "Manage SSH Keys." If it's there, SSH is likely already enabled for your account, and you just need connection details: your hosting username, the server hostname, and the port (usually 22, though some hosts assign something else).
A quick way to confirm from your own computer is to just try connecting: ssh username@yourdomain.com. What you see tells you a lot:
- A login prompt or key handshake means SSH is live and reachable.
- "Permission denied" usually means SSH is on but your credentials or key aren't authorized yet.
- "Connection refused" or a timeout usually means SSH isn't enabled, or something outside your account (like a firewall) is blocking it.
Before troubleshooting further, run through this short checklist: does your plan actually include SSH, does an SSH-enabled user exist on the account, and does your local network or firewall allow outbound SSH traffic on that port?
How to Enable SSH on Shared Hosting Through cPanel
Most shared hosting providers put SSH management directly inside cPanel, and the process is short:
- Log into cPanel with your hosting credentials.
- Go to Security → SSH Access.
- Click Manage SSH Keys. If SSH isn't already active, you'll usually see a toggle or an "enable" prompt right here, since cPanel's own SSH access documentation outlines this exact path for generating and authorizing keys.
- Follow the prompt to activate it, then generate or upload your key.
If you don't see an SSH option at all, some providers keep it disabled by default and require a support request. A short, specific message works best:
- State your account username and primary domain.
- Ask specifically to "enable SSH access for this shared hosting account."
- Mention the SSH user you'd like created, if your host requires one to be set up manually.
One detail that trips people up: port numbers. Most hosts run SSH on the standard port 22, but some assign a custom port for security reasons. That number is typically listed right next to your SSH Access settings in cPanel, as OVHcloud's own SSH access documentation shows for its shared web hosting accounts, alongside a clear note that there's no root or superuser access on those plans.
Generate SSH Keys and Authorize Them in cPanel
Passwords work for SSH, but keys are faster and considerably harder to compromise, since there's no password to guess or phish. The OpenSSH toolkit, specifically ssh-keygen, handles key generation on Linux, macOS, and modern Windows systems alike.
On Linux or macOS, open a terminal and run:
ssh-keygen -t ed25519 -C "your_email@example.com"to generate a modern, compact keypair.- Accept the default file location, which saves your private key to
~/.ssh/id_ed25519and your public key to~/.ssh/id_ed25519.pub. - Lock down permissions with
chmod 700 ~/.sshandchmod 600 ~/.ssh/id_ed25519, since SSH will refuse to use a private key with overly loose permissions.
On Windows, you have two solid routes. PowerShell now ships with a built-in OpenSSH client, so ssh-keygen works the same way it does on Linux. Alternatively, many people still prefer PuTTY and its companion tool PuTTYgen, which generates a keypair and saves the private half as a .ppk file, the format PuTTY expects for authentication.
Once you have a public key, head back to cPanel: Security → SSH Access → Manage SSH Keys → Import Key (or "Authorize" if the key already exists on the server). Confirm the fingerprint matches what your key-generation tool displayed, then you're set.
- Never share your private key file with anyone or upload it anywhere but your own machine.
- Store a backup of your key pair somewhere encrypted, not in a plain folder.
Pro Tip: Set a passphrase on your private key during generation, then load it once into ssh-agent (Linux/macOS) or Pageant (Windows, bundled with PuTTY) so you're not retyping it every single connection.
Connecting From Linux, macOS, Windows, and PuTTY
The plain OpenSSH command looks like this: ssh user@ssh.example.com -p 22. The username is your cPanel/SSH account name, the address is your server's hostname (sometimes it's your domain, sometimes a separate hostname your host provides), and the port defaults to 22 unless your provider says otherwise.
If you connect often, save yourself the typing with an SSH config file at ~/.ssh/config:
Host myshared
    HostName ssh.example.com
    User myusername
    Port 22
    IdentityFile ~/.ssh/id_ed25519
After that, ssh myshared does the whole job.
PuTTY users on Windows follow a slightly different flow: enter the hostname under "Host Name," set the port, choose "SSH" as the connection type, then browse to your .ppk file under Connection → SSH → Auth → Credentials. Save the session under a name you'll recognize, then just double-click it next time.
For moving files rather than running commands, scp and sftp piggyback on the same SSH connection. A single-file copy looks like scp user@host:/path/to/file ./, while sftp user@host opens an interactive file-transfer session, useful for browsing directories before you grab anything.
Useful Basic SSH Commands for File and Account Management
Once you're connected, a small set of commands covers most day-to-day work. These are documented in detail in the GNU Coreutils manual, which underpins nearly every Linux and macOS system's command-line tools.
ls,cd,pwdfor browsing and confirming your location in the file system.cat,less,nano(orvi) for viewing and editing files, though not every host installs every editor by default.cp,mv,rm,mkdirfor copying, renaming, deleting, and creating files or folders.tar -czf archive.tar.gz folder/to compress a folder before downloading or backing it up.scpandsftpfor transferring files securely between your computer and the server.chmodandchownfor adjusting permissions, though shared hosting will block you from changing ownership outside your own account.
One habit worth building early: there's no sudo on shared hosting, so if a command asks for elevated privileges, it simply isn't meant to run there. That's a feature of the isolation model, not a bug you need to work around.
Security Limits on Shared Hosting and When to Upgrade
Shared hosts run SSH inside a jailed or restricted shell specifically so one account can't touch another account's files or processes on the same physical server, an essential aspect of server hardening to protect your site. That isolation is why you won't find sudo, root, or the ability to install system packages on a typical shared plan.
Other limits you'll bump into on shared hosting:
- No root access, so system-level configuration changes are off the table.
- CPU, memory, and I/O quotas that throttle heavy or long-running processes.
- Restricted outbound ports and a cap on persistent background services.
None of this is a flaw in shared hosting. It's the exact design that keeps your neighbor's misbehaving script from taking down your site. But if your work genuinely needs root access, a custom kernel module, a persistent background service like a queue worker, or sustained heavy CPU and I/O, that's your signal to move to a VPS or dedicated server rather than fight the restrictions.
Fixing Common SSH Connection Errors
Most SSH problems fall into three buckets, and each has a fast fix.
- Permission denied (publickey) almost always means your public key isn't authorized on the server, or your SSH client is pointing at the wrong private key file. Recheck the key you uploaded in cPanel's Manage SSH Keys panel against your local
IdentityFile. - Connection refused or timed out typically points to a wrong hostname or port, or a firewall (yours or your host's) blocking the connection outright. Double-check the exact port cPanel lists for your account.
- Host key mismatch ("WARNING: REMOTE HOST IDENTIFICATION HAS CHANGED") means the server's fingerprint doesn't match what your client remembers. Sometimes that's a legitimate server migration or reimage; if you weren't told about one, stop and contact support before proceeding.
Pro Tip: Run ssh -vvv user@host to get verbose connection logs. Paste the relevant lines into a support ticket, and your host's team can usually diagnose the issue in minutes instead of guessing.
Best Practices for Managing and Rotating SSH Keys
Generating a key once and forgetting about it is how most SSH security problems start. Treat your keys the way you'd treat a set of physical office keys: know who has a copy, and change the locks periodically.
Start by using a distinct keypair per device rather than copying one private key across your laptop, desktop, and any server you SSH from. If a laptop gets stolen or a machine gets compromised, you can revoke just that one key in cPanel's Manage SSH Keys panel without disrupting every other connection you have.
Set a realistic rotation schedule. Many teams rotate keys annually, or immediately after someone with access leaves a project or a device is retired. Rotating simply means generating a fresh keypair, authorizing the new public key on the server, testing the new connection, then removing the old public key from authorized_keys through cPanel.
Keep a private inventory of which key lives on which machine, and note the date it was generated. That sounds like overkill for a single personal site, but it becomes essential the moment more than one person (a developer, a freelancer, an agency) needs server access.
A few habits worth locking in from day one:
- Use
ed25519keys over older RSA formats when your host supports them, since they're smaller and computationally faster to verify. - Never reuse a personal SSH key that also unlocks a work server or another client's hosting account.
- Remove unused public keys from cPanel the same day a project or contractor relationship ends.
Checking and Configuring Firewall Settings That Block SSH
If a connection attempt just hangs or times out rather than being refused outright, a firewall is the most likely culprit, and it could be sitting on either side of the connection.
On your own machine or network, corporate firewalls, some public Wi-Fi networks, and certain ISPs block outbound traffic on non-standard ports, and occasionally even block port 22 entirely. Test this quickly by trying the same SSH connection from a different network, like your phone's mobile hotspot. If it connects there but not on your original network, the block is local, not on the hosting side.
On the server side, your hosting provider may allow SSH only from certain IP ranges, or may require the connection to hit a specific port other than 22. This detail typically lives right in the SSH Access section of cPanel, alongside your username and hostname, similar to how OVHcloud documents the exact SSH server address and port for its shared web hosting plans.
A few checks worth running in order:
- Confirm the port your host actually assigned, rather than assuming it's 22.
- Test the connection from a second network to rule out a local block.
- Check whether your router or VPN client has an outbound rule restricting SSH traffic.
- If you manage your own firewall (like
ufwon a personal machine used as a jump host), confirm the relevant port is open for outbound connections.
Understanding cPanel's SSH Timeout and Session Settings
cPanel doesn't expose deep SSH daemon configuration to shared hosting users the way a VPS would, but a few session-related behaviors still matter day to day, and understanding them saves you from thinking something's broken when it isn't.
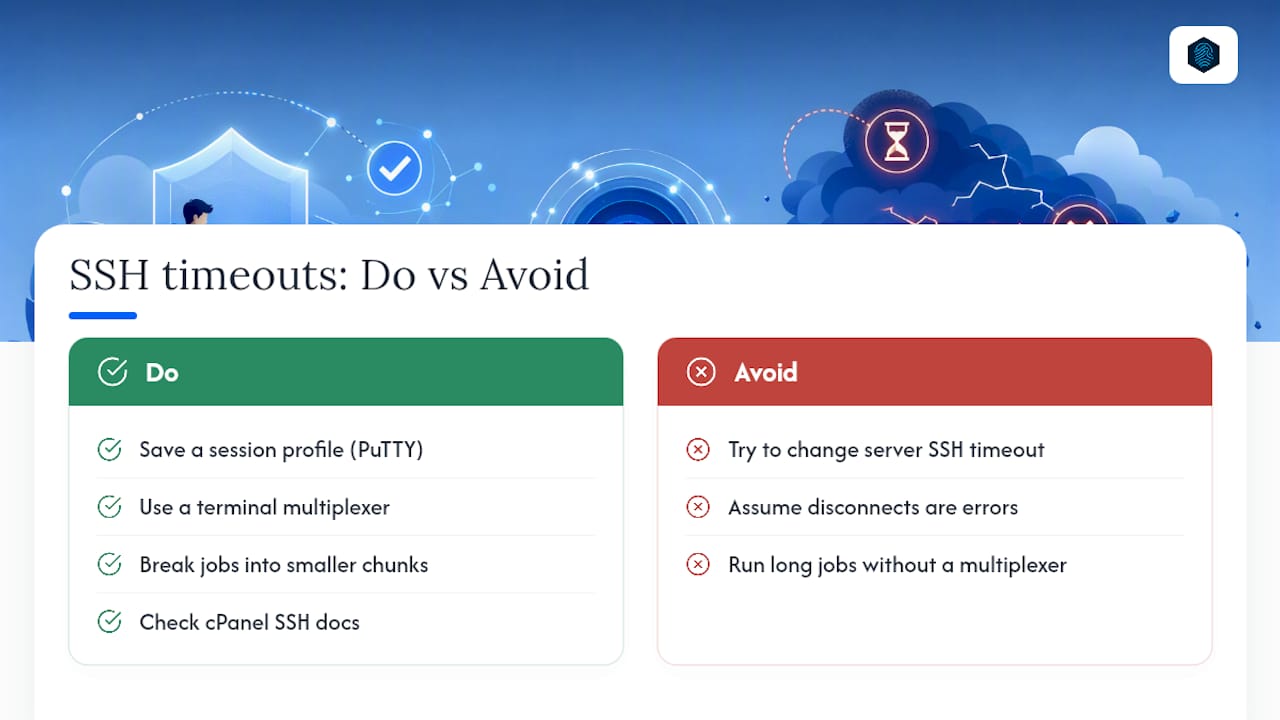
Idle sessions get disconnected after a period of inactivity, a setting controlled server-side rather than by you. If you've stepped away mid-task and come back to a dead terminal, that's expected behavior, not an error. Reconnecting takes seconds if you've saved a session profile in PuTTY or an entry in your ~/.ssh/config file.
cPanel's own documentation on SSH access covers how keys and access toggles are managed from the interface, and it's worth a look if you want to see exactly what controls your account exposes versus what's locked at the server level. On shared hosting, you generally can't adjust the SSH daemon's timeout value yourself, since that setting affects every account on the box, not just yours.
If frequent timeouts are disrupting long-running tasks (a large file transfer, a lengthy tar operation), the practical workaround is running the task inside a terminal multiplexer if your host permits one, or simply breaking the job into smaller chunks that finish before the idle timeout kicks in.
Transferring Files Securely With Graphical SFTP Clients
Not everyone wants to memorize scp syntax, and that's fine. SFTP works over the same secure connection as SSH, and several graphical clients let you drag and drop files the way you would in a normal file browser, while still encrypting everything in transit.

To connect, you'll need the same three details you'd use for a terminal SSH session: your server's hostname, your SSH username, and the port cPanel assigned to your account. Plug those into the client's connection settings, choose SFTP (not plain FTP) as the protocol, and authenticate with either your password or the same SSH key you generated earlier. Most modern SFTP clients accept both OpenSSH-format keys and PuTTY's .ppk files directly.
Once connected, the interface typically splits into two panes: your local computer's files on one side, the server's directory on the other. Dragging a file from one side to the other transfers it, no command syntax required. For anyone managing a WordPress install, a theme's file structure, or nightly backups, this visual approach is often faster than typing out full paths for every single file.
The security is identical to command-line SFTP, since it's the same encrypted protocol underneath, just with a friendlier interface layered on top.
Why SSH still earns its place on shared hosting
SSH access turns a slow, click-heavy file manager workflow into something you can actually move through quickly, and that alone makes it worth enabling on any shared plan that offers it. But it's not a substitute for a server where you control the whole stack. Once you're fighting the restrictions instead of working within them, that's your cue to plan the move to something with root.
How inSave Hosting Handles SSH on Shared Plans
If you've been following along, you already know SSH access depends on your host actually supporting it well, not just flipping a switch buried three menus deep. inSave Hosting builds SSH into its shared hosting plans through the same cPanel dashboard covered throughout this guide, so enabling keys, managing access, and connecting from Linux, macOS, or Windows works exactly as described above, no extra hoops.

Beyond SSH, inSave Hosting shared plans come with 99.9% uptime, free SSL certificates, and one-click WordPress installs, all backed by LiteSpeed and free CDN integration for sites that need real speed without a VPS-sized bill. If you're outgrowing a slower host or just want SSH access that actually works the first time you try it, check out inSave Hosting's shared hosting plans and get your account, and your SSH keys, running today.
Sources
FAQ
Does Shared Hosting Support SSH Access?
Most shared hosting providers, including inSave Hosting, support SSH access, though it's typically a restricted, account-level shell rather than full root access.
What Port Does SSH Use on Shared Hosting?
Port 22 is the standard default, but some providers assign a custom port, which is usually listed in the SSH Access section of cPanel.
Can I Use SSH Keys Instead of a Password?
Yes, and it's the recommended approach. Generate a keypair with ssh-keygen or PuTTYgen, then authorize the public key through cPanel's Manage SSH Keys tool.
Why Am I Getting "Permission Denied (publickey)"?
This usually means your public key isn't authorized on the server yet, or your SSH client is pointing to the wrong private key file.
When Should I Upgrade From Shared Hosting to a VPS?
Upgrade once you need root access, custom system software, persistent background services, or consistently heavy CPU and I/O beyond what a shared plan allows.